インディ・ジョーンズ パズル ガイド: 泉の秘密を解き明かす
著者: Audrey
Jan 23,2025

インディ ジョーンズ アンド ザ サークルには、まるで映画からそのまま出てきたかのようなユニークなパズルがいっぱいです。ここでは、ゲームのバチカン部分にある「悔い改めの泉」パズルを完成させ、巨人の謎を解く方法についてのガイドを紹介します。
前のレベルで「スティグマ」パズルを解決し、バチカンの地下エリアから脱出した後、インディは巨人の墓で見つけた巻物を使って、次にどこに行くべきか、「巨人の泉」を見つけます。苦行。
これまでのミッションと同様に、パズルを解くときに必ず各標識、彫像、壁画の写真を撮って、後でスキルをレベルアップするために使用できるアドベンチャー ポイントを獲得してください。
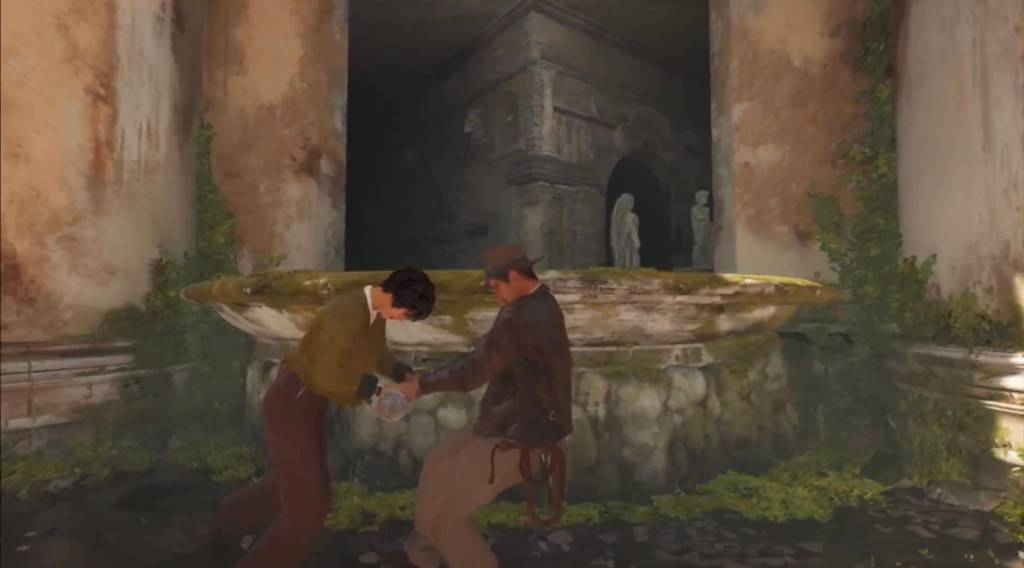
そこに到達するには、プレイヤーは「聖痕」ミッションの開始時と同じようにアントニオのオフィスから出る必要があります。ジャーナルの地図を使用してウェイポイントをたどると、外の中庭に苦行の泉につながる階段が見つかり、そこからパズルが始まります。
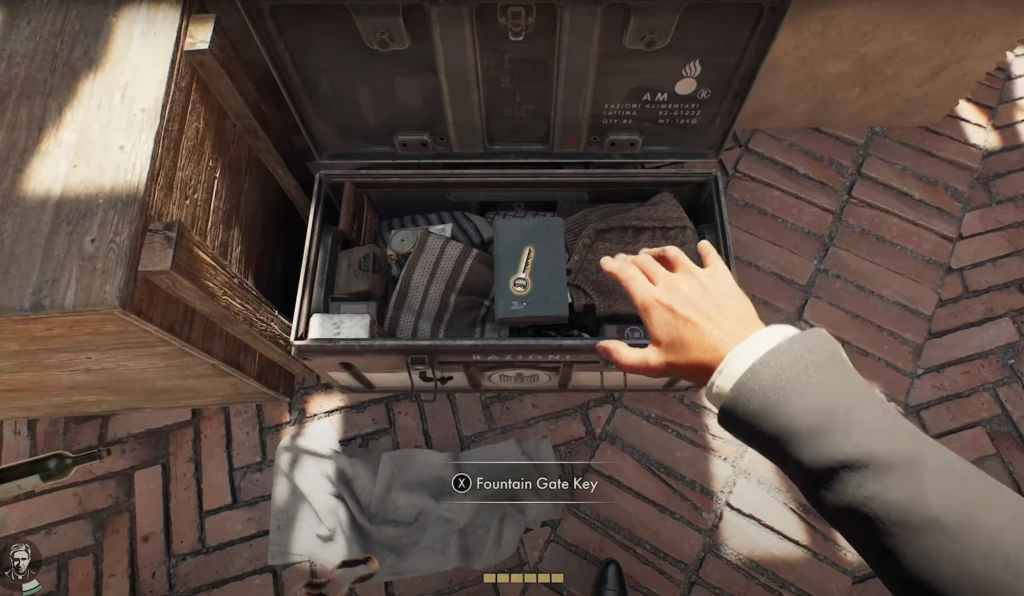
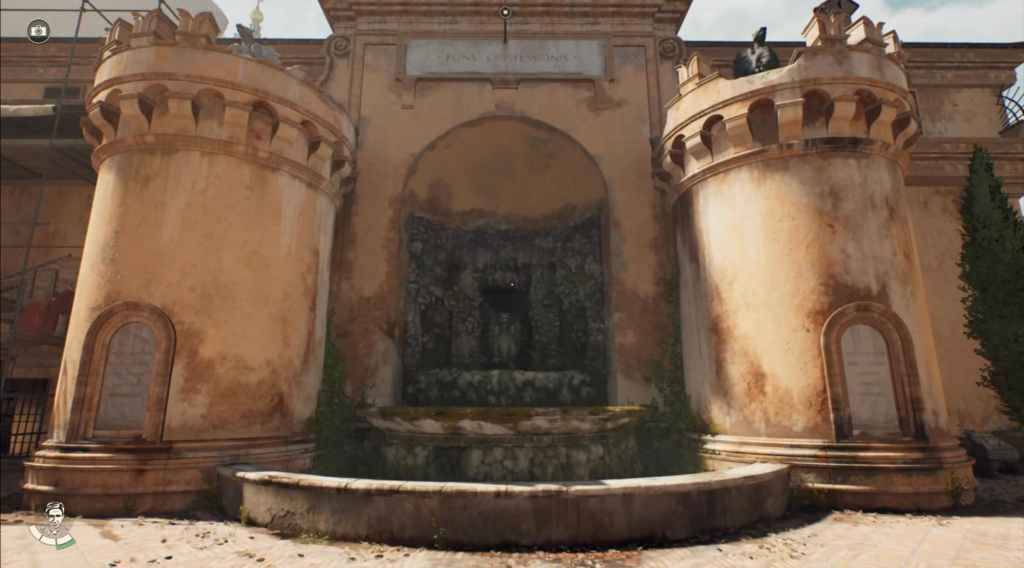 このパズルの最初のステップの 1 つは、建設エリアの近く、噴水の右側にある宝箱です。宝箱には噴水の鍵が入っており、プレイヤーは噴水の隣の保管室に入ることができます。
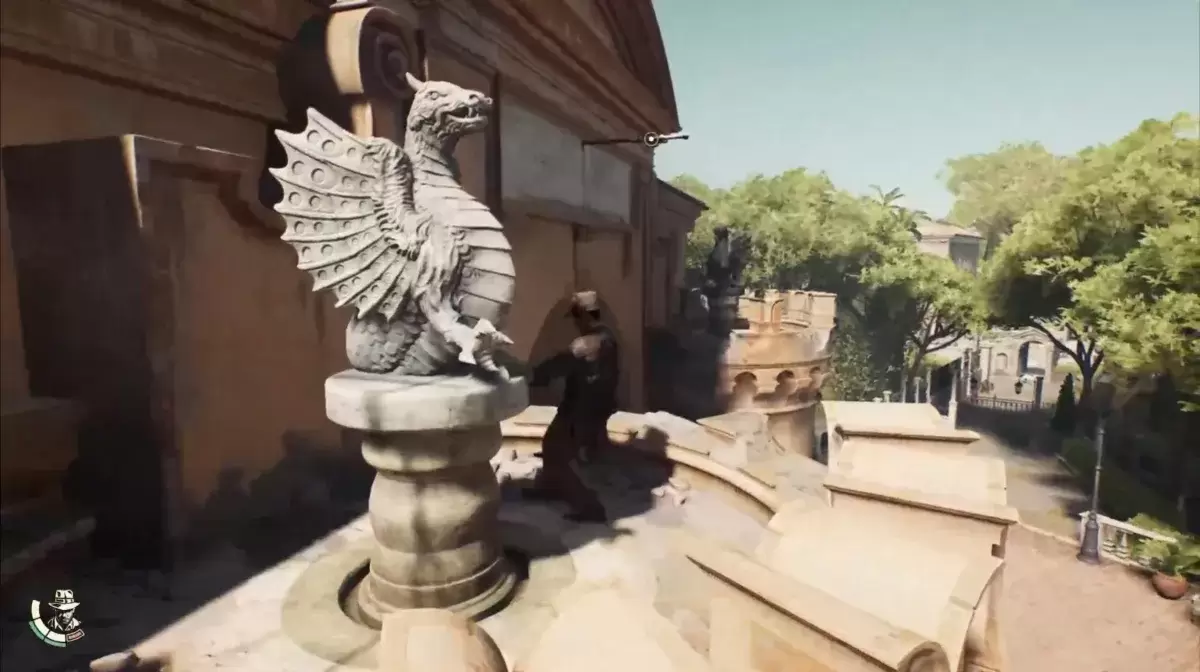
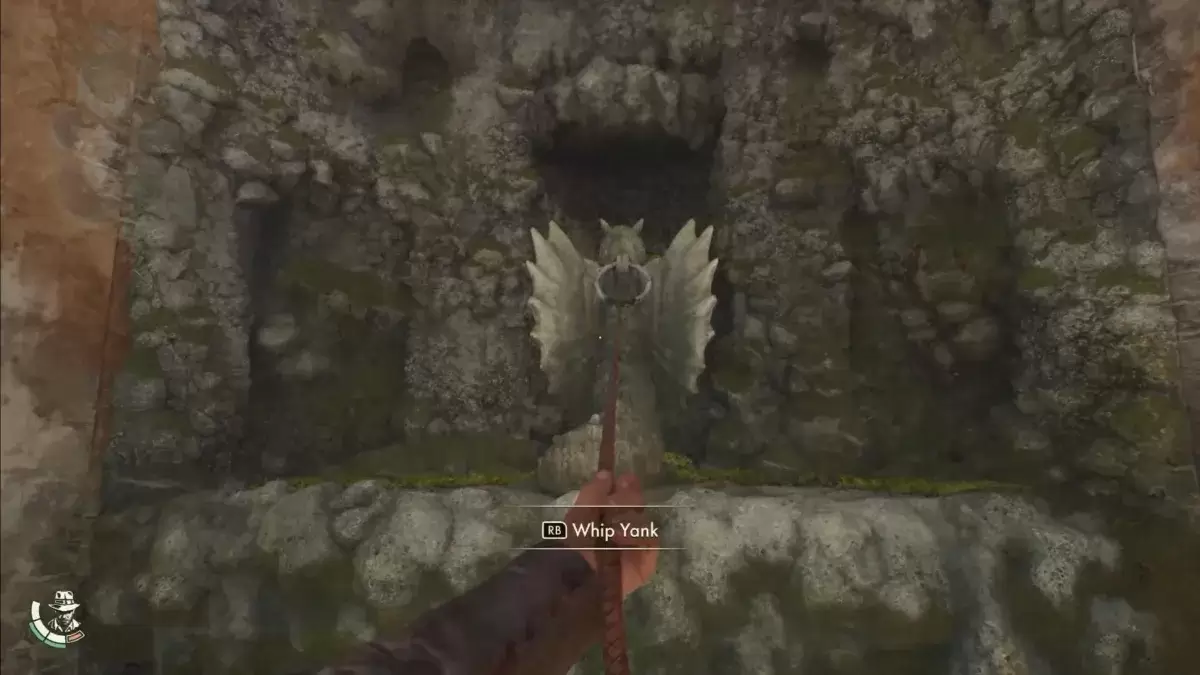
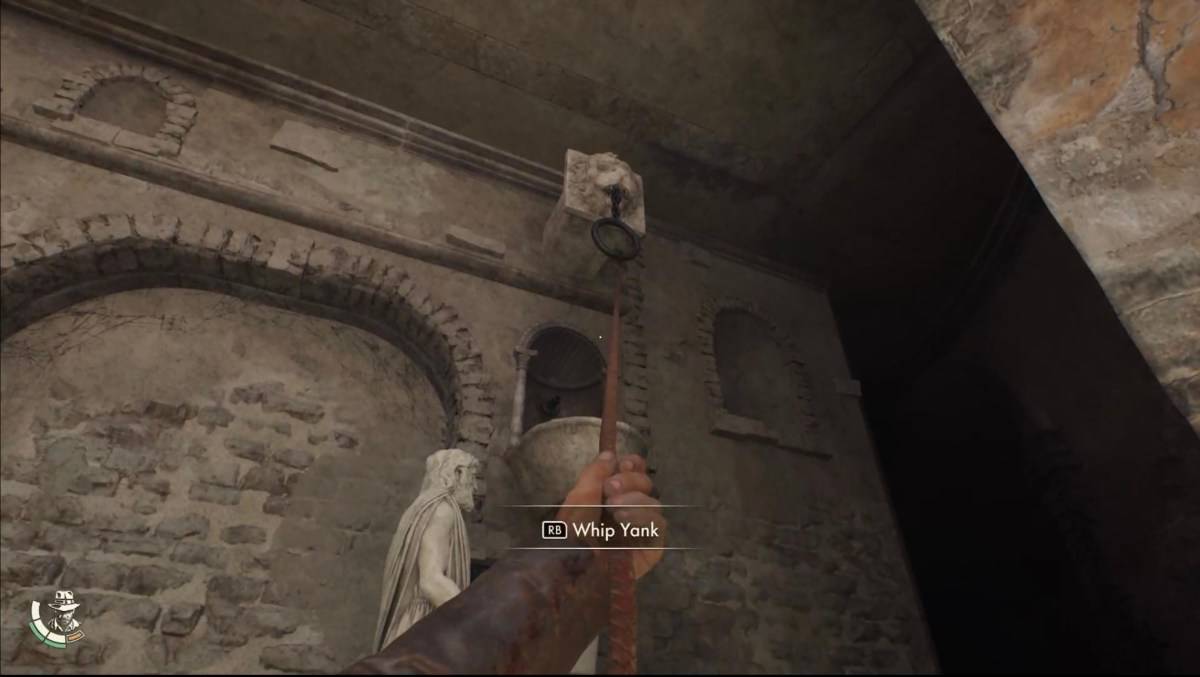
 保管室に入ったら、インディの鞭を使って建物の頂上まで降り、もう一度鞭を使って窓に向かって振り、再び噴水の頂上に行きます。ここで、プレイヤーは、それぞれ前を向いた 2 つの龍の形をした彫像に気づくでしょう。今、目の前の竜像には何も出来ない。代わりに、鞭で 2 番目のドラゴンの像に向かって振り、像から伸びるドラゴンの爪を掴んでレバーを作動させます。
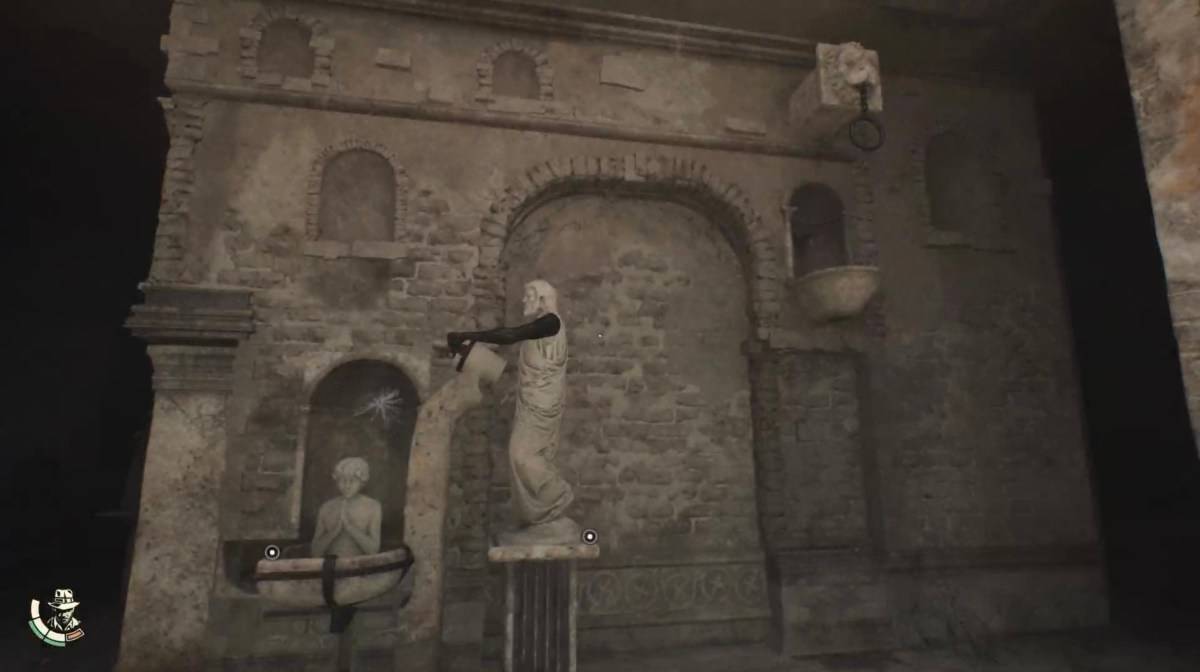
 インディにこのレバーを掴んでもらい、左スティックを上下に動かして像を動かしたい方向を変えてください。具体的には、ドラゴンの像を移動して、反対側のドラゴンと向き合う必要があります。ドラゴンが正しい位置に着いたら、もう一方のドラゴンに戻って同じことを行います。このとき初めて、インディは爪が欠けていることに気づきました。
あなたとあなた自身の像の左側にある足場を見ると、欠けていたドラゴンの爪が外れて落ちていることがわかります。鞭を使ってその近くに降りると、ジーナ・ロンバルディがインディを妨害し、彼を落下させるカットシーンがトリガーされます。そして、この調査記者が謎を解くお手伝いをします。カットシーンが終了したら、中断した場所に戻り、ドラゴンの爪を手に入れます。
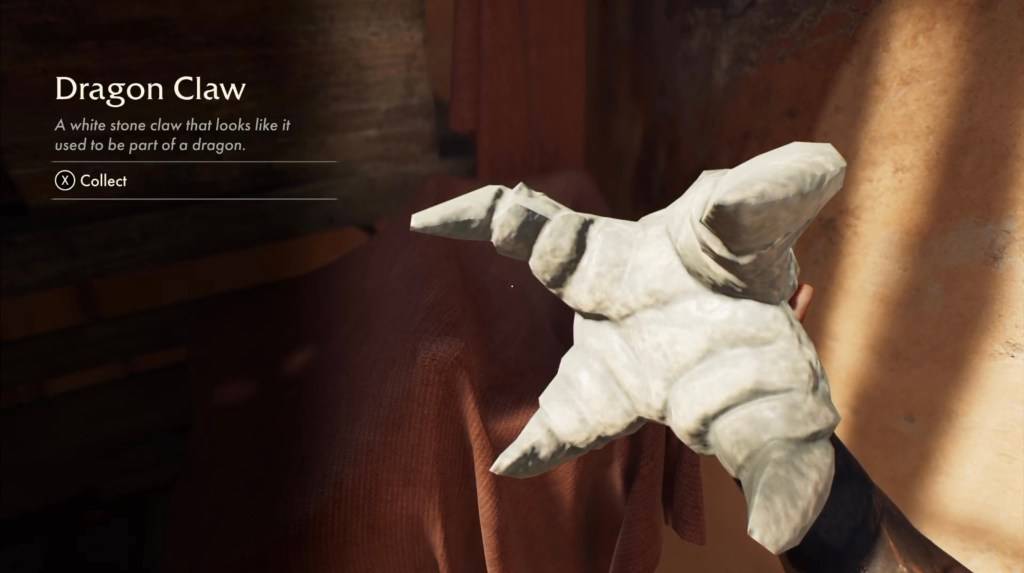 像の上に登り、ドラゴンの像に爪を差し込み、以前の像の場合と同じようにレバーを使ってドラゴンが向かい合うようにします。そうすると、1階の苦行の泉の像が壁に向かって回転します。この時点で、2 つのドラゴン像のセクションが完了したので、地面に降りて、インディ ジョーンズ アンド ザ サークルの苦行の泉パズルの残りの部分を完成させます。

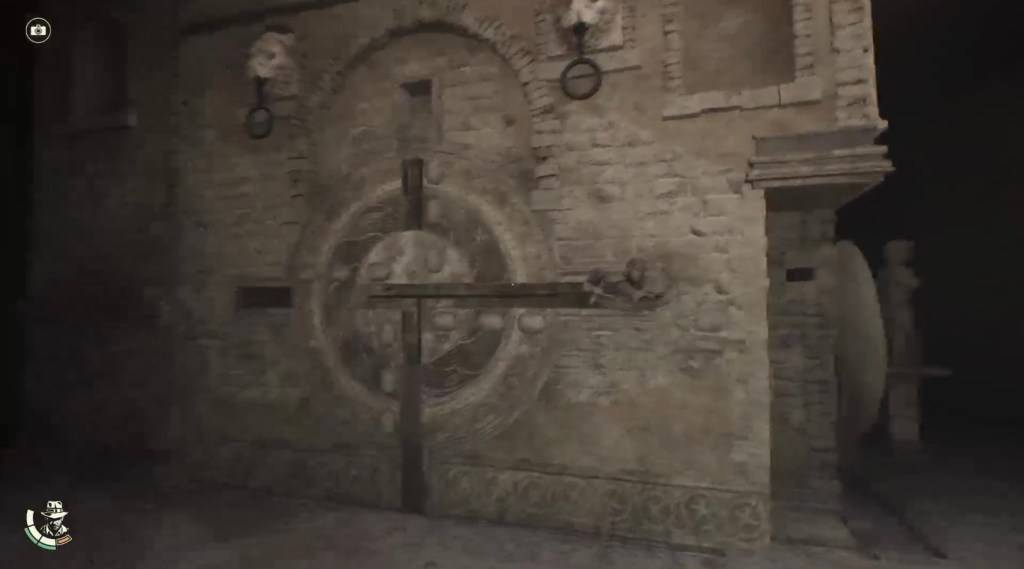
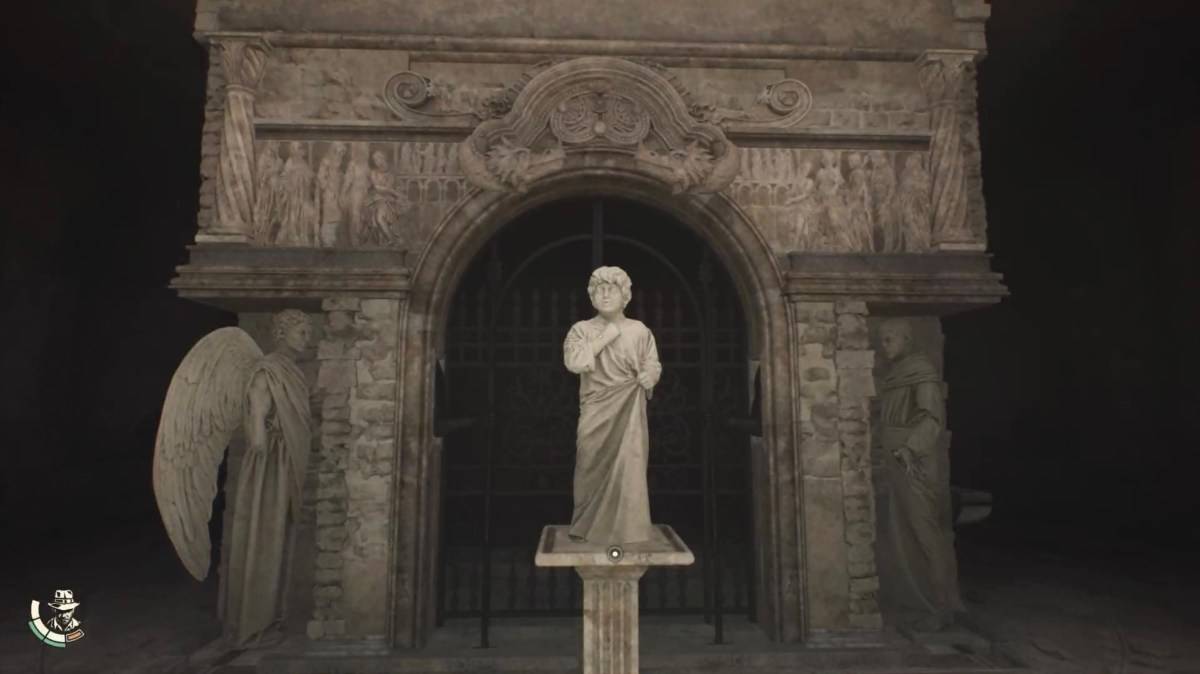
 噴水に戻ると、インディの鞭を使って像を引っ張る必要があります。これにより、苦行の泉の前の壁が動き、3 つの異なる彫像に囲まれた落とし窓が現れます。現状では、3 つの彫像が水門を塞いでいます。像の左側に天使、右側に男性、中央に小さな像があります。
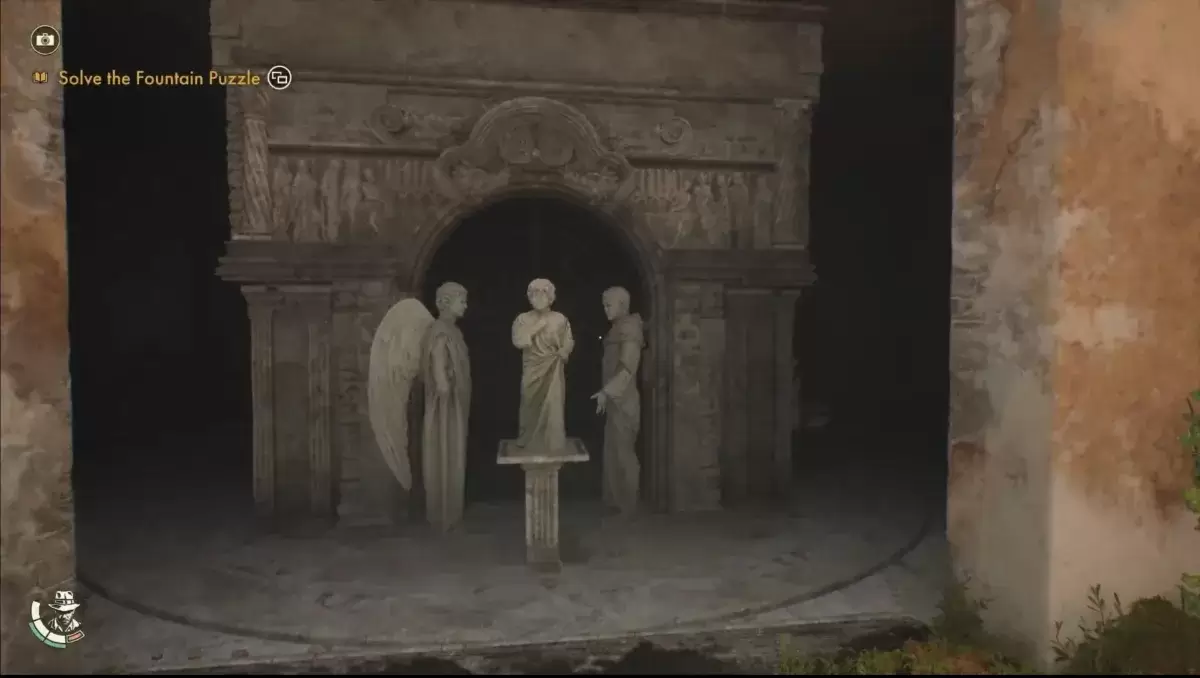 苦行の泉の目標は、門を守る 2 つの彫像の両側にある壁のパズルを解くことです。最初の壁パズルを開始するには、プレイヤーはゲートが最初に現れたときに噴水の外に飛び出すレバーを押す必要があります。インディとジーナが一緒にそれを押して、洗礼を描いた最初の壁のパズルを明らかにします。噴水の両側の柱にはいくつかの碑文があり、写真を撮ると冒険ポイントを獲得したり、パズルを完成させる方法のヒントが得られます。
関連: インディ・ジョーンズとサークルがタイムラインに収まる場所
 最初のパズルは簡単です。インディに大きな男性像をバケツの下に来るように移動させます。そこから、鞭を使って水のメカニズムを作動させ、像が持っているバケツを水で満たします。その後、インディにコントローラーの左スティックを使って像を小さい像の方へ押してもらい、実質的に像に「洗礼」を与えます。これで最初のパズルが完了し、像が門の左側に移動し、苦行の泉パズルの前半が完了します。
 パズルを解き、最初の像がそれに応じて動くのを確認したら、インディとジーナがもう一度レバーを押して 2 番目の壁のパズルを表示します。このパズルは複雑で、天使の像を壁の一方の側からもう一方の側に移動させるために、パスに沿って石のさまざまな層を移動する必要があります。パスには制御する 3 つの異なるレイヤーがあり、フィギュアを左から右に移動するにはパスを一列に並べる必要があります。インディは鞭を使って壁の左上隅と右上隅にあるハンドルを制御し、像を左右に動かすことができます。天使を壁の右側に完全に移動すると、このパズルの後半が完了します。
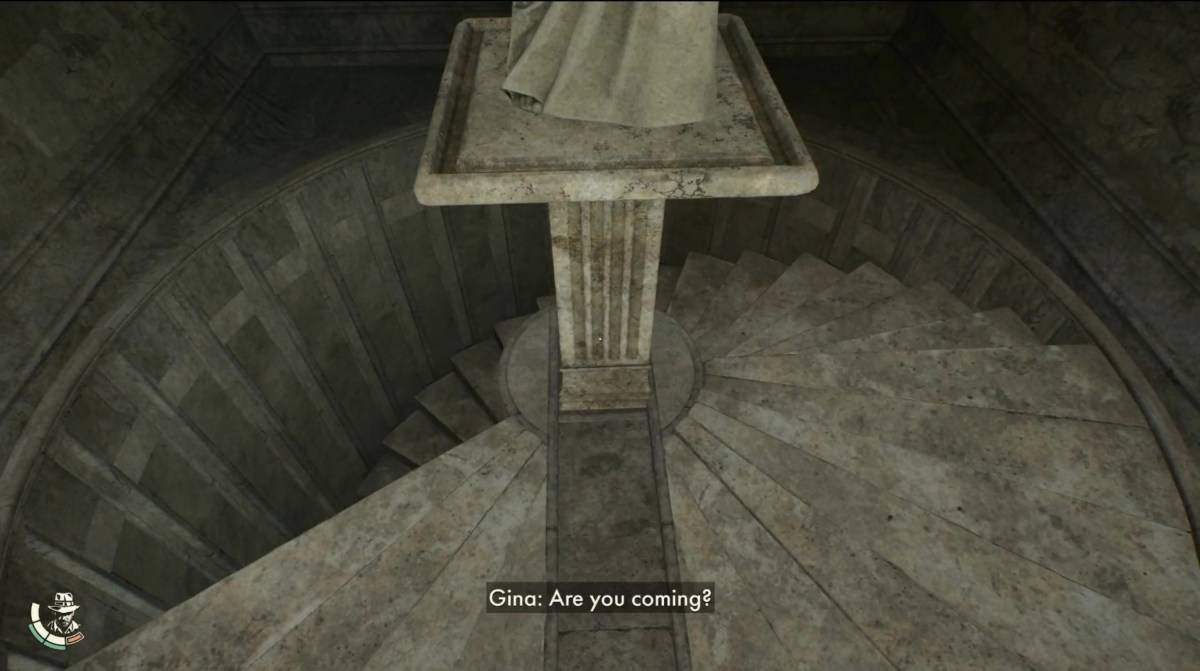
 さて、門の左側にある像が脇に移動し、いよいよ門が開きます。ただし、パズルを完成するには、もう 1 つ (簡単な) 手順が必要です。残った中央の像を門に押し込むだけです。これにより、螺旋階段がアクティブになり、ゲームの次の部分を開始できるようになります。
 これは、インディ ジョーンズ アンド ザ サークルの苦行の泉パズルを完成させる方法です。
インディ・ジョーンズ アンド ザ サークルは PC と Xbox で利用できるようになりました。