Path of Exile 2 Expeditions: 総合ガイド
Path of Exile 2 では、オリジナル ゲームの Expedition League に基づいて改良されたエンドゲーム システムである Expeditions が導入されています。このガイドでは、遠征の仕組み、報酬、および関連するパッシブ スキル ツリーについて説明します。 Four 主要なエンドゲーム イベント – せん妄、違反、儀式、遠征 – がアトラス マップで待っています。 遠征マップ ノードには、特徴的な水色の螺旋アイコンが付いています。
遠征の開始と完了

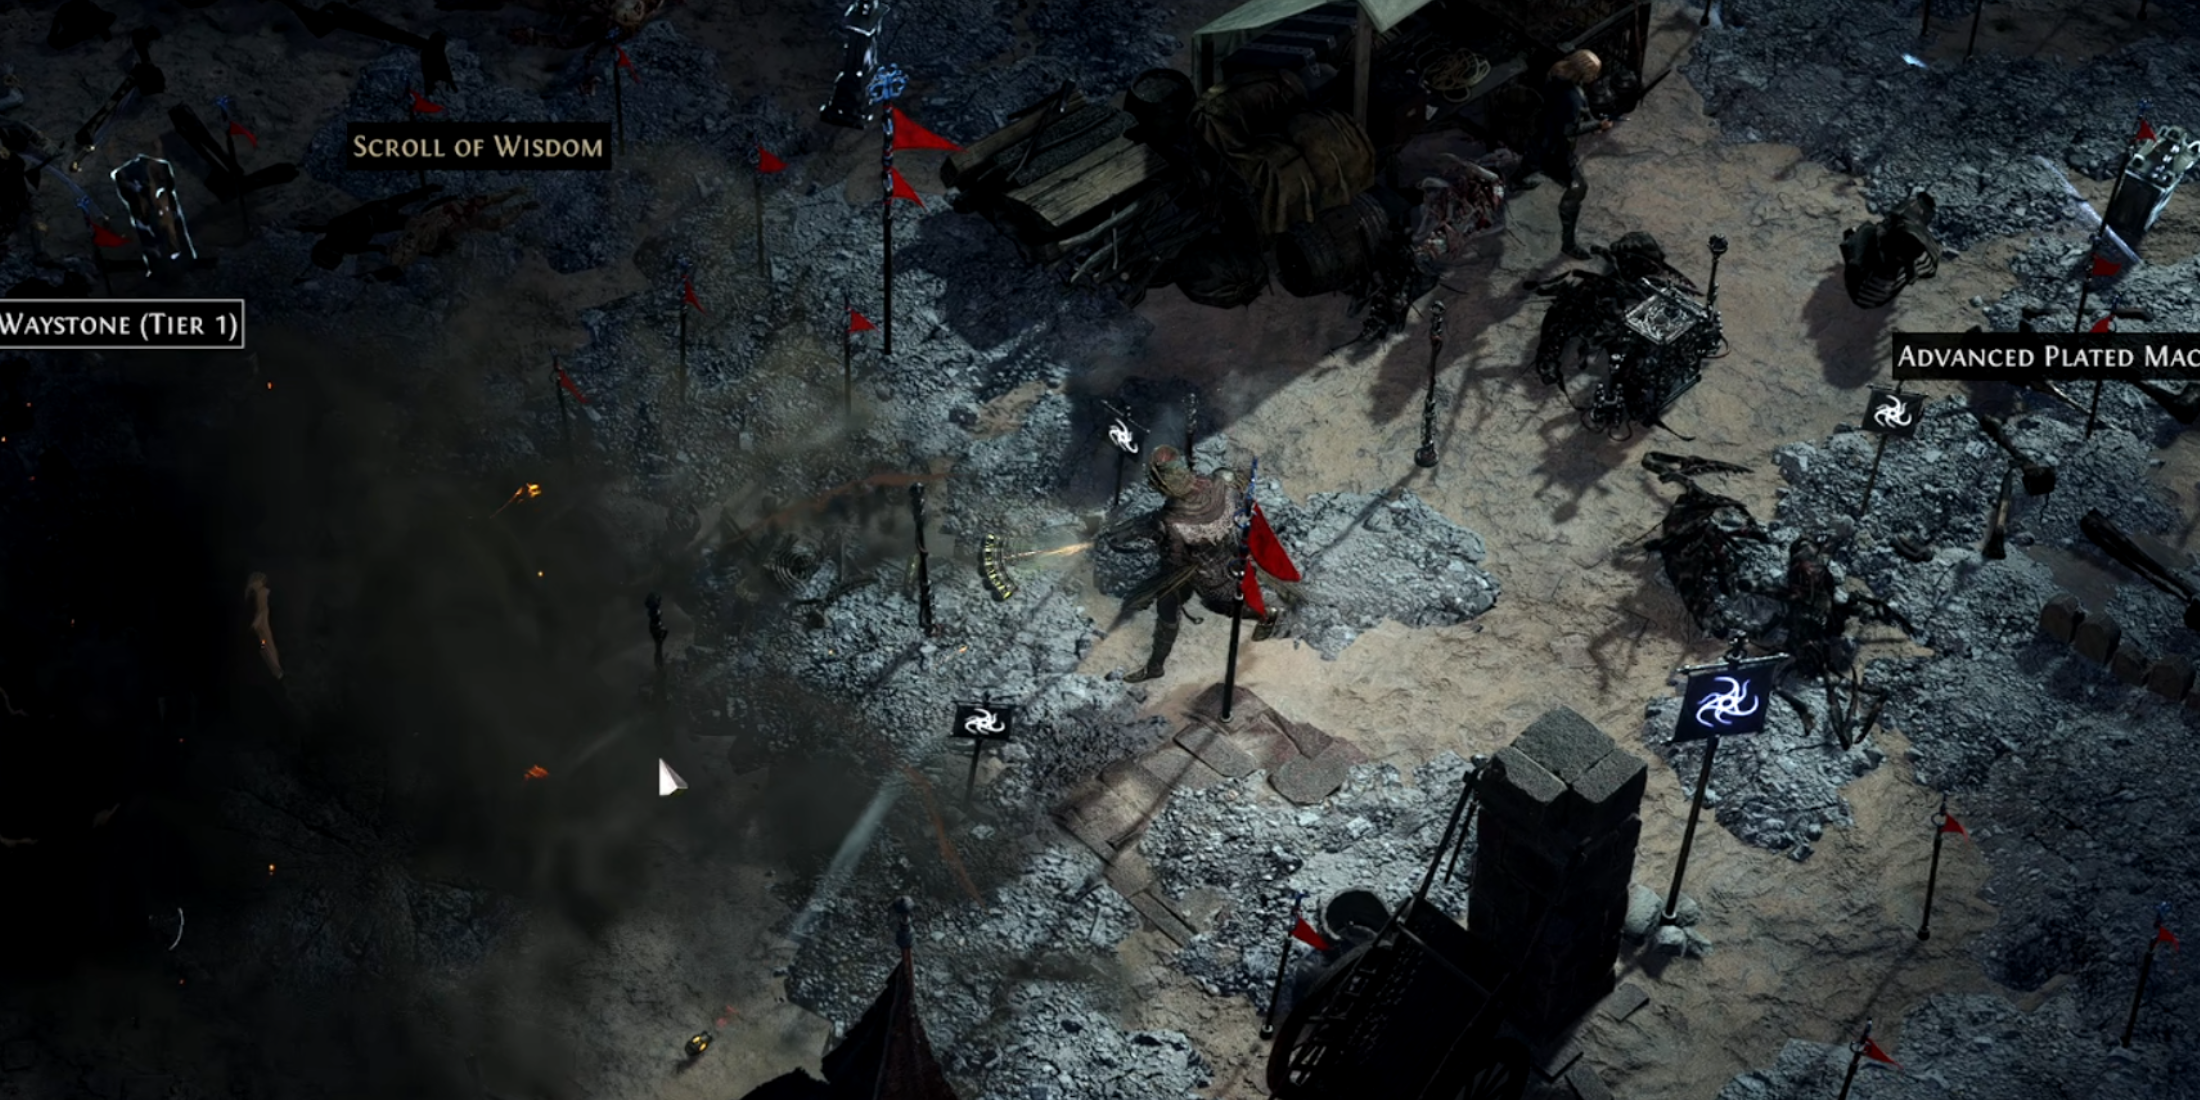
遠征との遭遇を保証するには、アトラスの完了したロスト タワー スロットで遠征プリカーサー タブレットを使用します。 遠征隊のマップに入ったら、マークされたエリアを見つけて four NPC の 1 人と対話します。
核となるメカニズムには、マーカーの近くに爆発物を戦略的に配置して、ルーンモンスターや発掘された宝箱を召喚することが含まれます。
- ルーンモンスター: レッドマーカーの近くの爆発物からスポーンします。より大きなマーカーはより大きなモンスターパックを生成し、Unearthed Remnantsによって強化されます。
- 発掘された残骸: 有益または有害な修正を提供するレリック (例: 属性ダメージが増加するが、チェストからのアイテムのレアリティが高くなる)。
- 発掘されたチェスト: スパイラルシンボルの付いたブラックマーカーの近くで爆発物が爆発すると表示されます。これらのチェストには、アーティファクト、ログブック、通貨、ウェイストーン、ハイエンド装備が含まれています。
爆発物の UI を使用して、爆発物の影響範囲 (AoE) を視覚化します。 最適な農業を実現するには、AoE サークルの重複を避けてください。爆発物を設置したら、起爆装置を作動させます。 圧倒された場合は、後退して後で戻ることができます。イベントはエリアを出ても終了しません。
遠征ピナクルマップとオルロス
ルーンモンスターと発掘された宝箱は遠征日誌をドロップするチャンスがあります。 隠れ家でダニッグと一緒にこれらを使用すると、遠征ピナクル マップにアクセスできます。これは、より多くの爆発物を備えた非常に大規模な遠征です。
このマップには、手強いボス、オルロス (ミニマップ上の頭蓋骨で示されています) が登場します。 オルロスを倒すと、2 倍の遠征パッシブ スキル ツリー ポイント、貴重な通貨、およびユニークなアイテムを獲得するチャンスが得られます。 マップレベルが高いほど、オルロスが出現する可能性が高くなります。
遠征パッシブスキルツリー

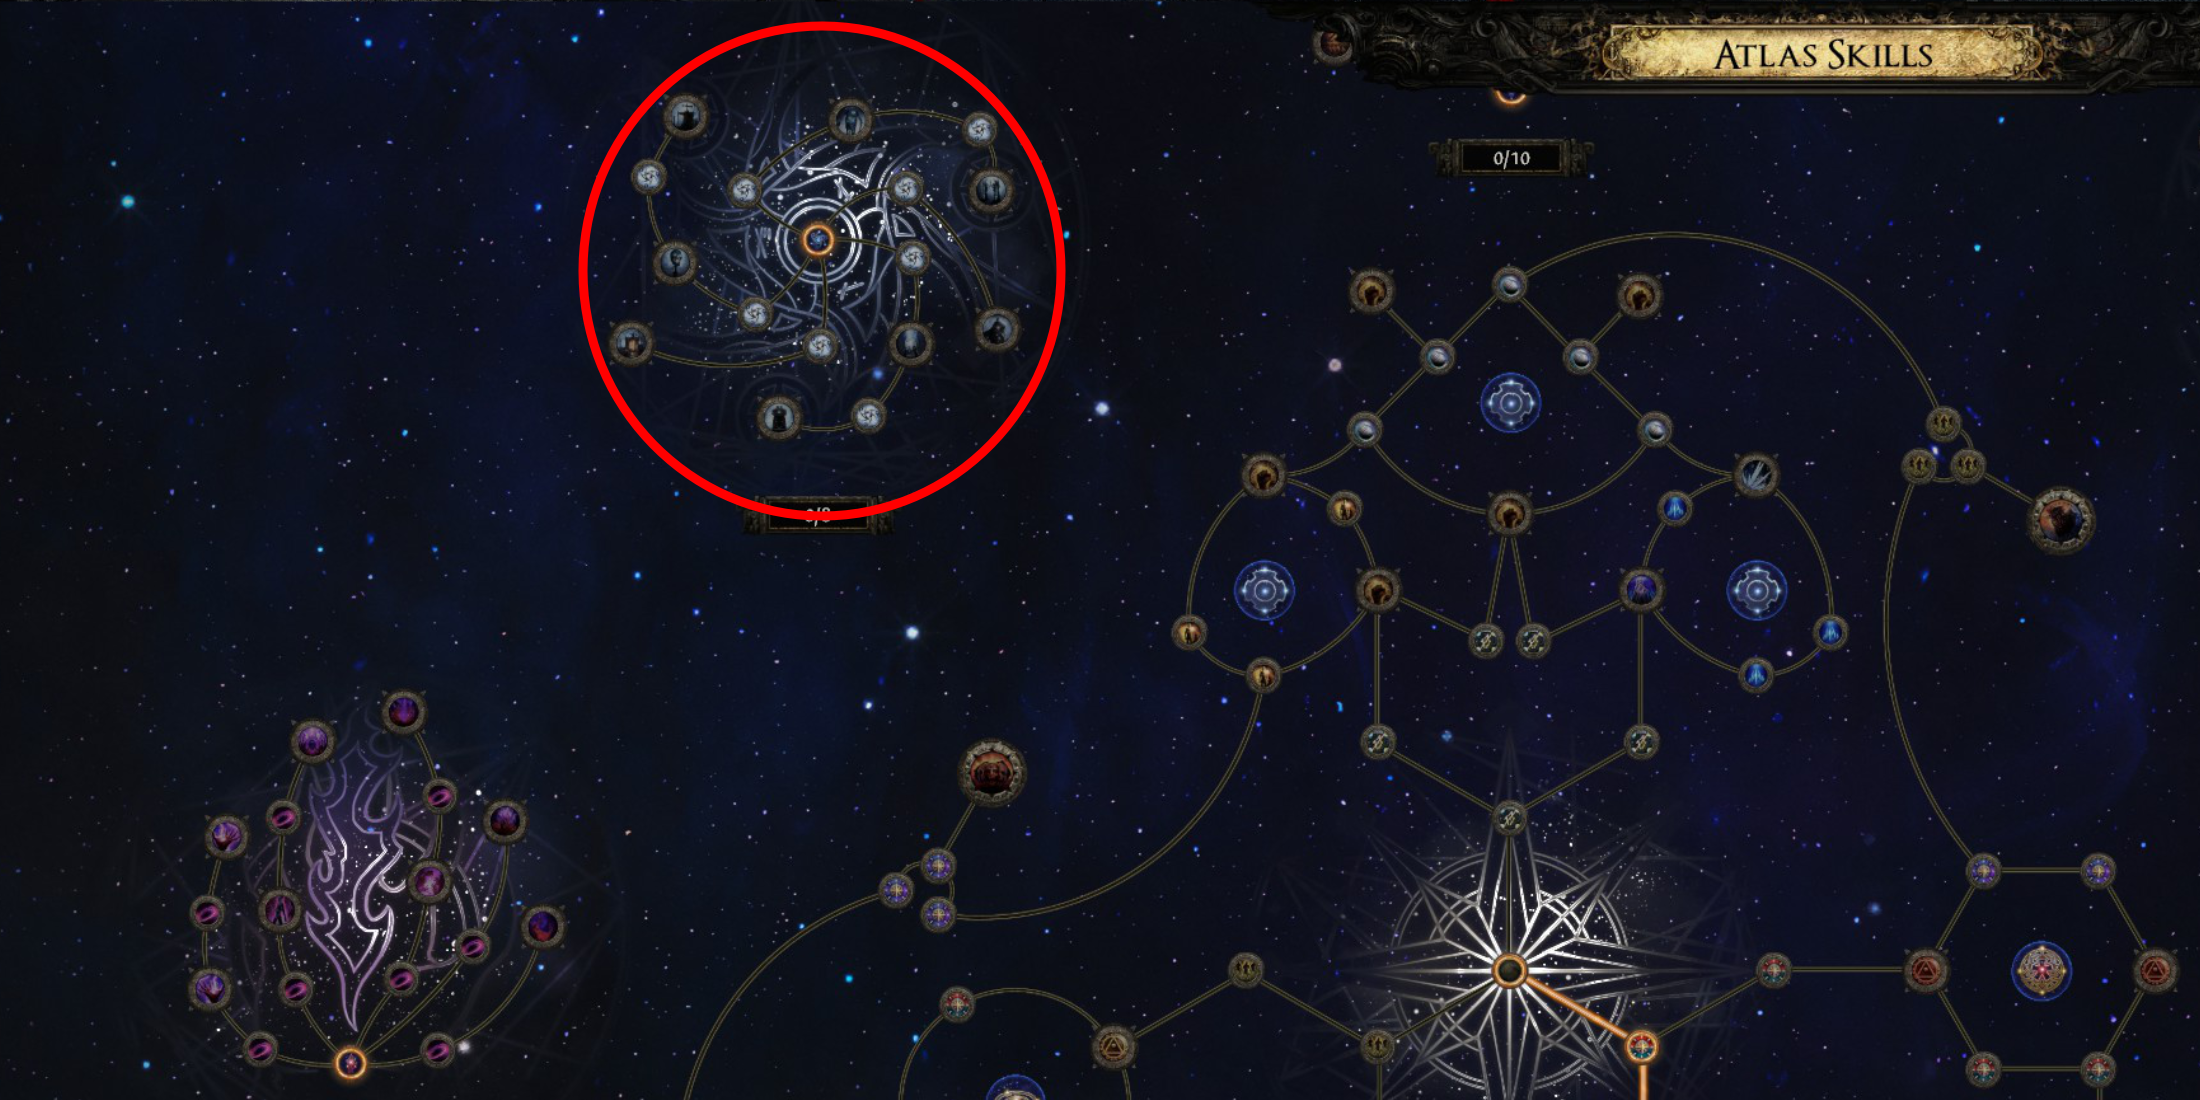
Atlas パッシブ スキル ツリーからアクセスできる Expedition パッシブ スキル ツリーは、Expedition のエクスペリエンスを強化します。 アトラス スキル ツリー メニューの右上にあり、らせん状の青いデザインが特徴です。
ツリーには、注目すべきノードとログブックの難易度が上昇するノードが表示されます。 これらのノードのロックを解除するためのポイントを獲得するには、オルロスを倒すことが重要です。
| Notable Expedition Passive | Effect | Requirements |
|---|---|---|
| Extreme Archaeology | Reduces Explosives to 1, but boosts radius (150%), placement range (100%), and reduces enemy Life (20%) | N/A |
| Disturbed Rest | 50% more Runic Monster Flags | N/A |
| Detailed Records | 50% more Logbooks, Logbooks always spawn with 3x Modifiers | Disturbed Rest |
| Timed Detonations | 50% more Artifacts, Detonation chains 50% faster | N/A |
| Legendary Battles | 50% more Rare monsters, 50% more Exotic Coinage | Timed Detonations |
| Frail Treasures | 3x more Excavated Chest Markers, but they disappear after 5 seconds | N/A |
| Weight of History | 35% boost to Remnant effects | N/A |
| Unearthed Anomalies | Remnants gain an additional Suffix and Prefix modifier | Weight of History |
大幅な報酬ブーストを得るには、「乱れた休息」、「詳細な記録」、「時限爆発」を優先してください。 次に、難易度を上げてさらに良い報酬を得るために、「歴史の重み」、「発掘された異常」、「伝説の戦い」を検討してください。 「極端な考古学」は爆発物が大幅に減るため避けてください。
遠征の報酬

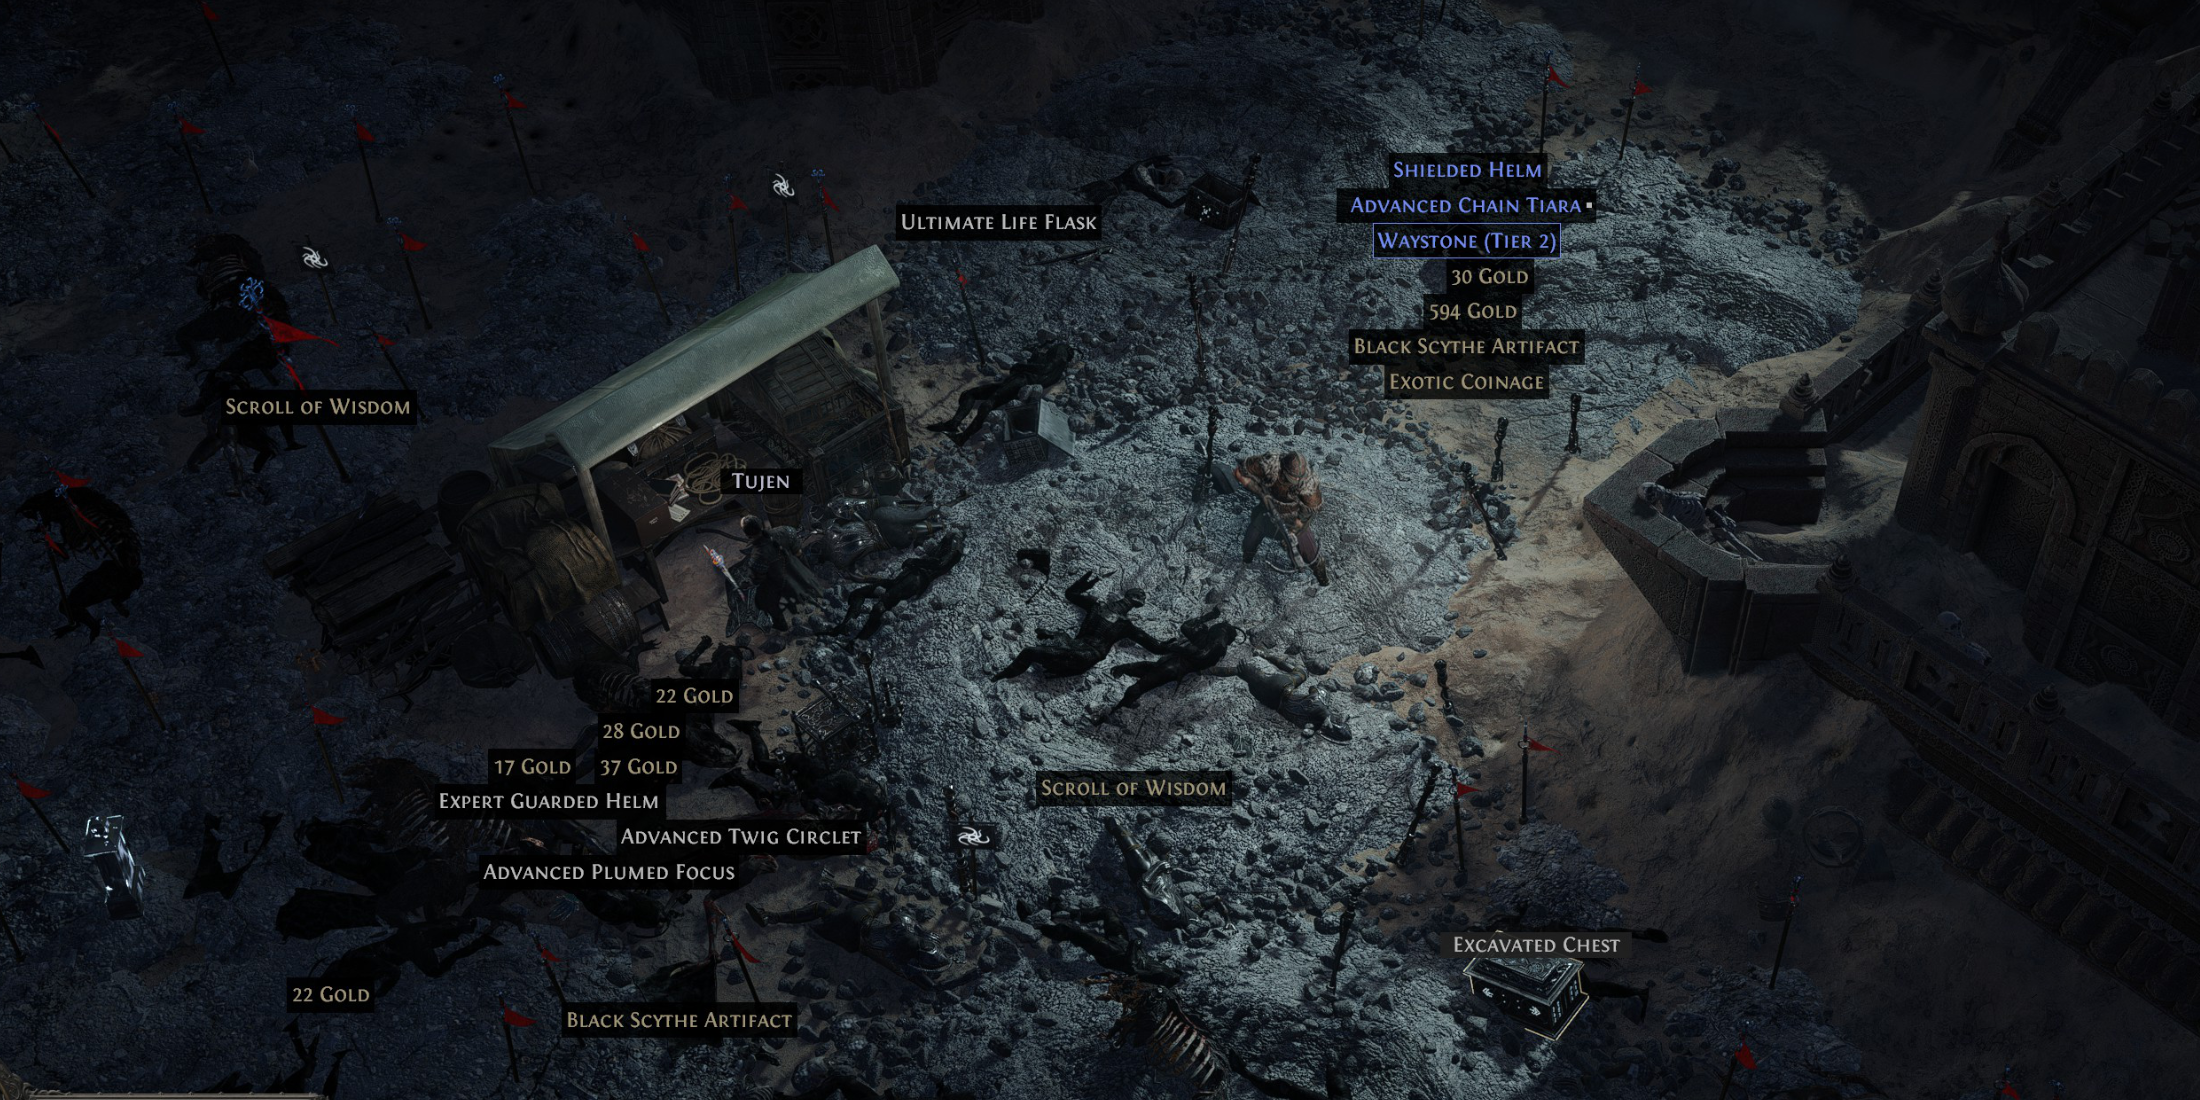
主な報酬はアーティファクトで、特定のベンダーと装備を交換するために使用されます。
| Reward | Use | Gear |
|---|---|---|
| Broken Circle Artifact | Gwennen (Weapons) | Weapons |
| Black Scythe Artifact | Tujen (Belts and Jewelry) | Belts & Jewelry |
| Order Artifact | Rog (Armor) | Armor |
| Sun Artifact | Dannig (Used to acquire other Artifacts) | Various |
| Exotic Coinage | Refreshes vendor inventory | N/A |
各遠征には 1 つのベンダーが登場します。 アーティファクトはマップ完了後に消費されません。 Exotic Coinage はあらゆるベンダーの在庫を更新します。 ルーンモンスターや発掘された宝箱から入手できる遠征日誌により、ピナクルマップのロックが解除され、オルロスと戦って特別な報酬を得るチャンスが得られます。
Welcome to the Destiny Rising Gacha Guide – your ultimate resource to understand how the gacha system works, including summons, pity mechanics, and rate-up banners. Whether you're a new player or trying to optimize your pulls, this guide breaks down everything you need to know to make informed decisions.
🔑 1. Understanding Destiny Rising’s Gacha System
Destiny Rising uses a standard gacha model common in mobile RPGs, featuring:
Standard Banner (Normal Summon) – For non-rate-up characters.
Rate-Up Banner (Special Summon) – Features 5-star (★★★★★) characters with higher drop rates.
Pity System – Ensures you don’t get "lucked out" forever.
Guarantee Mechanics – Critical to maximizing value.
🎯 2. Summon Mechanics: How It Works
✅ Single Summon (1x Summon)
Cost: 120 Stamina (or 60 Gems, depending on currency used)
Result: 1 random character (or weapon) from the current banner.
5-star (★★★★★): 0.6% base chance (on standard banners).
4-star (★★★★): 5.1% base chance.
3-star (★★★): 94.3% base chance.
💡 Note: On rate-up banners, the 5-star rate for specific characters increases dramatically.
🔥 3. Rate-Up Banners: The Key to Getting Your Favorite Character
🎁 What Is a Rate-Up Banner?
A limited-time banner that boosts the drop rate of 1–2 specific 5-star characters.
These characters have a higher base chance (e.g., 1.5%–2.0%) vs. the standard 0.6%.
📌 Example:
Banner Name: “The Eternal Guardian – Althea” (Rate-Up)
Rate-Up 5-Star: Althea (★★★★★)
Rate-Up Chance: 2.0% (vs. 0.6% standard)
Other 5-stars: Still possible, but less likely.
✅ Pro Tip: Always check the banner details before pulling — only the rate-up characters are boosted.
🧩 4. Pity System: Your Safety Net
Destiny Rising uses a pity system to prevent endless bad luck. Here’s how it works:
🌟 Pity 1: 5-Star Guarantee
After 90 summons without a 5-star, the 91st summon is guaranteed to be 5-star.
This is true for all banners (standard or rate-up).
Pity is not reset by switching banners.
⚙️ Pity 2: Rate-Up Guarantee (Pity 2)
After 70 summons without a rate-up 5-star, the next 5-star (on a rate-up banner) is guaranteed to be the rate-up character.
This means:
If you’ve pulled 70 summons and haven’t gotten the rate-up 5-star, your next 5-star will be them.
Pity 2 does not apply on standard banners.
✅ Why It Matters:
Rate-up banners are worth waiting for to avoid wasting summons.
If you’re after a specific 5-star, wait until pity 2 kicks in.
📊 5. How to Use Pity & Rate-Up Strategically
✅ Best Pulling Strategy (For Rate-Up Characters)
Step
Action
1
Start pulling on a rate-up banner.
2
Track your summons.
3
At 70 summons, you’re guaranteed to get the rate-up 5-star on your next 5-star pull.
4
At 90 summons, you’re guaranteed a 5-star, regardless of type.
5
Pull until you get the rate-up 5-star, or accept it at 90 if you’re not aiming for it.
❌ Common Mistakes to Avoid
Pulling on a non-rate-up banner just to "save" pity (it doesn’t help).
Assuming rate-up increases apply to all 5-stars (they only boost the highlighted ones).
Forgetting that pity carries over between banners.
💰 6. Currency Management: Gems, Stamina, and Events
🪙 Stamina (Free Daily)
Max: 300
1 summon = 120 stamina
You can do 2 full 10-pull sets (20 summons) per day.
Not enough for 90-pull pity run → use gems for bulk.
💎 Gems (Paid)
Best for full 90-pull pity runs.
10-pull = 600 gems (standard cost)
10-pull bundles often offer discounts.
💡 Tip: Wait for free 10-pull events or double-gem days to maximize value.
🎁 7. Bonus: Events & Free Pulls
Welcome Events: 10 free summons for new players.
Anniversary/Seasonal Events: Free 10-pull banners or extra pity.
Special Promotions: Guaranteed 5-star on first 50 pulls (check official Discord/website).
📢 Always check official channels for limited-time offers.
✅ Final Tips: How to Win the Gacha
Always use rate-up banners when targeting a 5-star.
Wait until 70 summons on a rate-up banner to guarantee your target.
Track your summon count with a spreadsheet or app.
Avoid pulling on standard banners unless you’re okay with a random 5-star.
Use gems wisely — save for full 90-pull runs or guaranteed 5-star events.
🎉 Summary
Feature
Details
5-Star Base Chance (Standard)
0.6%
5-Star Rate-Up Chance
1.5%–2.0% (for selected characters)
Pity 1 (5-star guarantee)
90th summon
Pity 2 (Rate-Up guarantee)
70th summon on rate-up banner
Best Strategy
Pull on rate-up banner → wait for pity 2 or 90-pull
🎯 Remember: The gacha is luck-based, but pity and rate-ups make it fair. Use the system, not fight it.
Good luck, summoner! May the stars guide your pulls.
✨ “Destiny Rising isn’t just about luck — it’s about timing, strategy, and knowing when to pull.”
📌 Need help tracking pity? Use a free gacha tracker app like:
Gacha Tracker (iOS/Android)
Google Sheets template (search “Destiny Rising Gacha Tracker”)
Let me know if you want a custom spreadsheet template or help choosing your next rate-up banner! 🎮