Dragon Quest 3 Remake: Baramos\'s Lair Walkthrough
Author: Adam
Feb 11,2025

Conquering Baramos's Lair in Dragon Quest 3 Remake: A Comprehensive Guide
After securing the Six Orbs and hatching Ramia the Everbird, your journey culminates in Baramos's Lair. This challenging dungeon serves as a crucial test before venturing into the underworld. This guide details navigating and completing Baramos's Lair in Dragon Quest III HD-2D Remake.
Baramos's Lair houses the Archfiend Baramos, the primary antagonist of the game's first half. Access is granted only after obtaining Ramia. Aim for a party level of at least 20 before tackling this challenge. The dungeon holds several valuable items, detailed below.
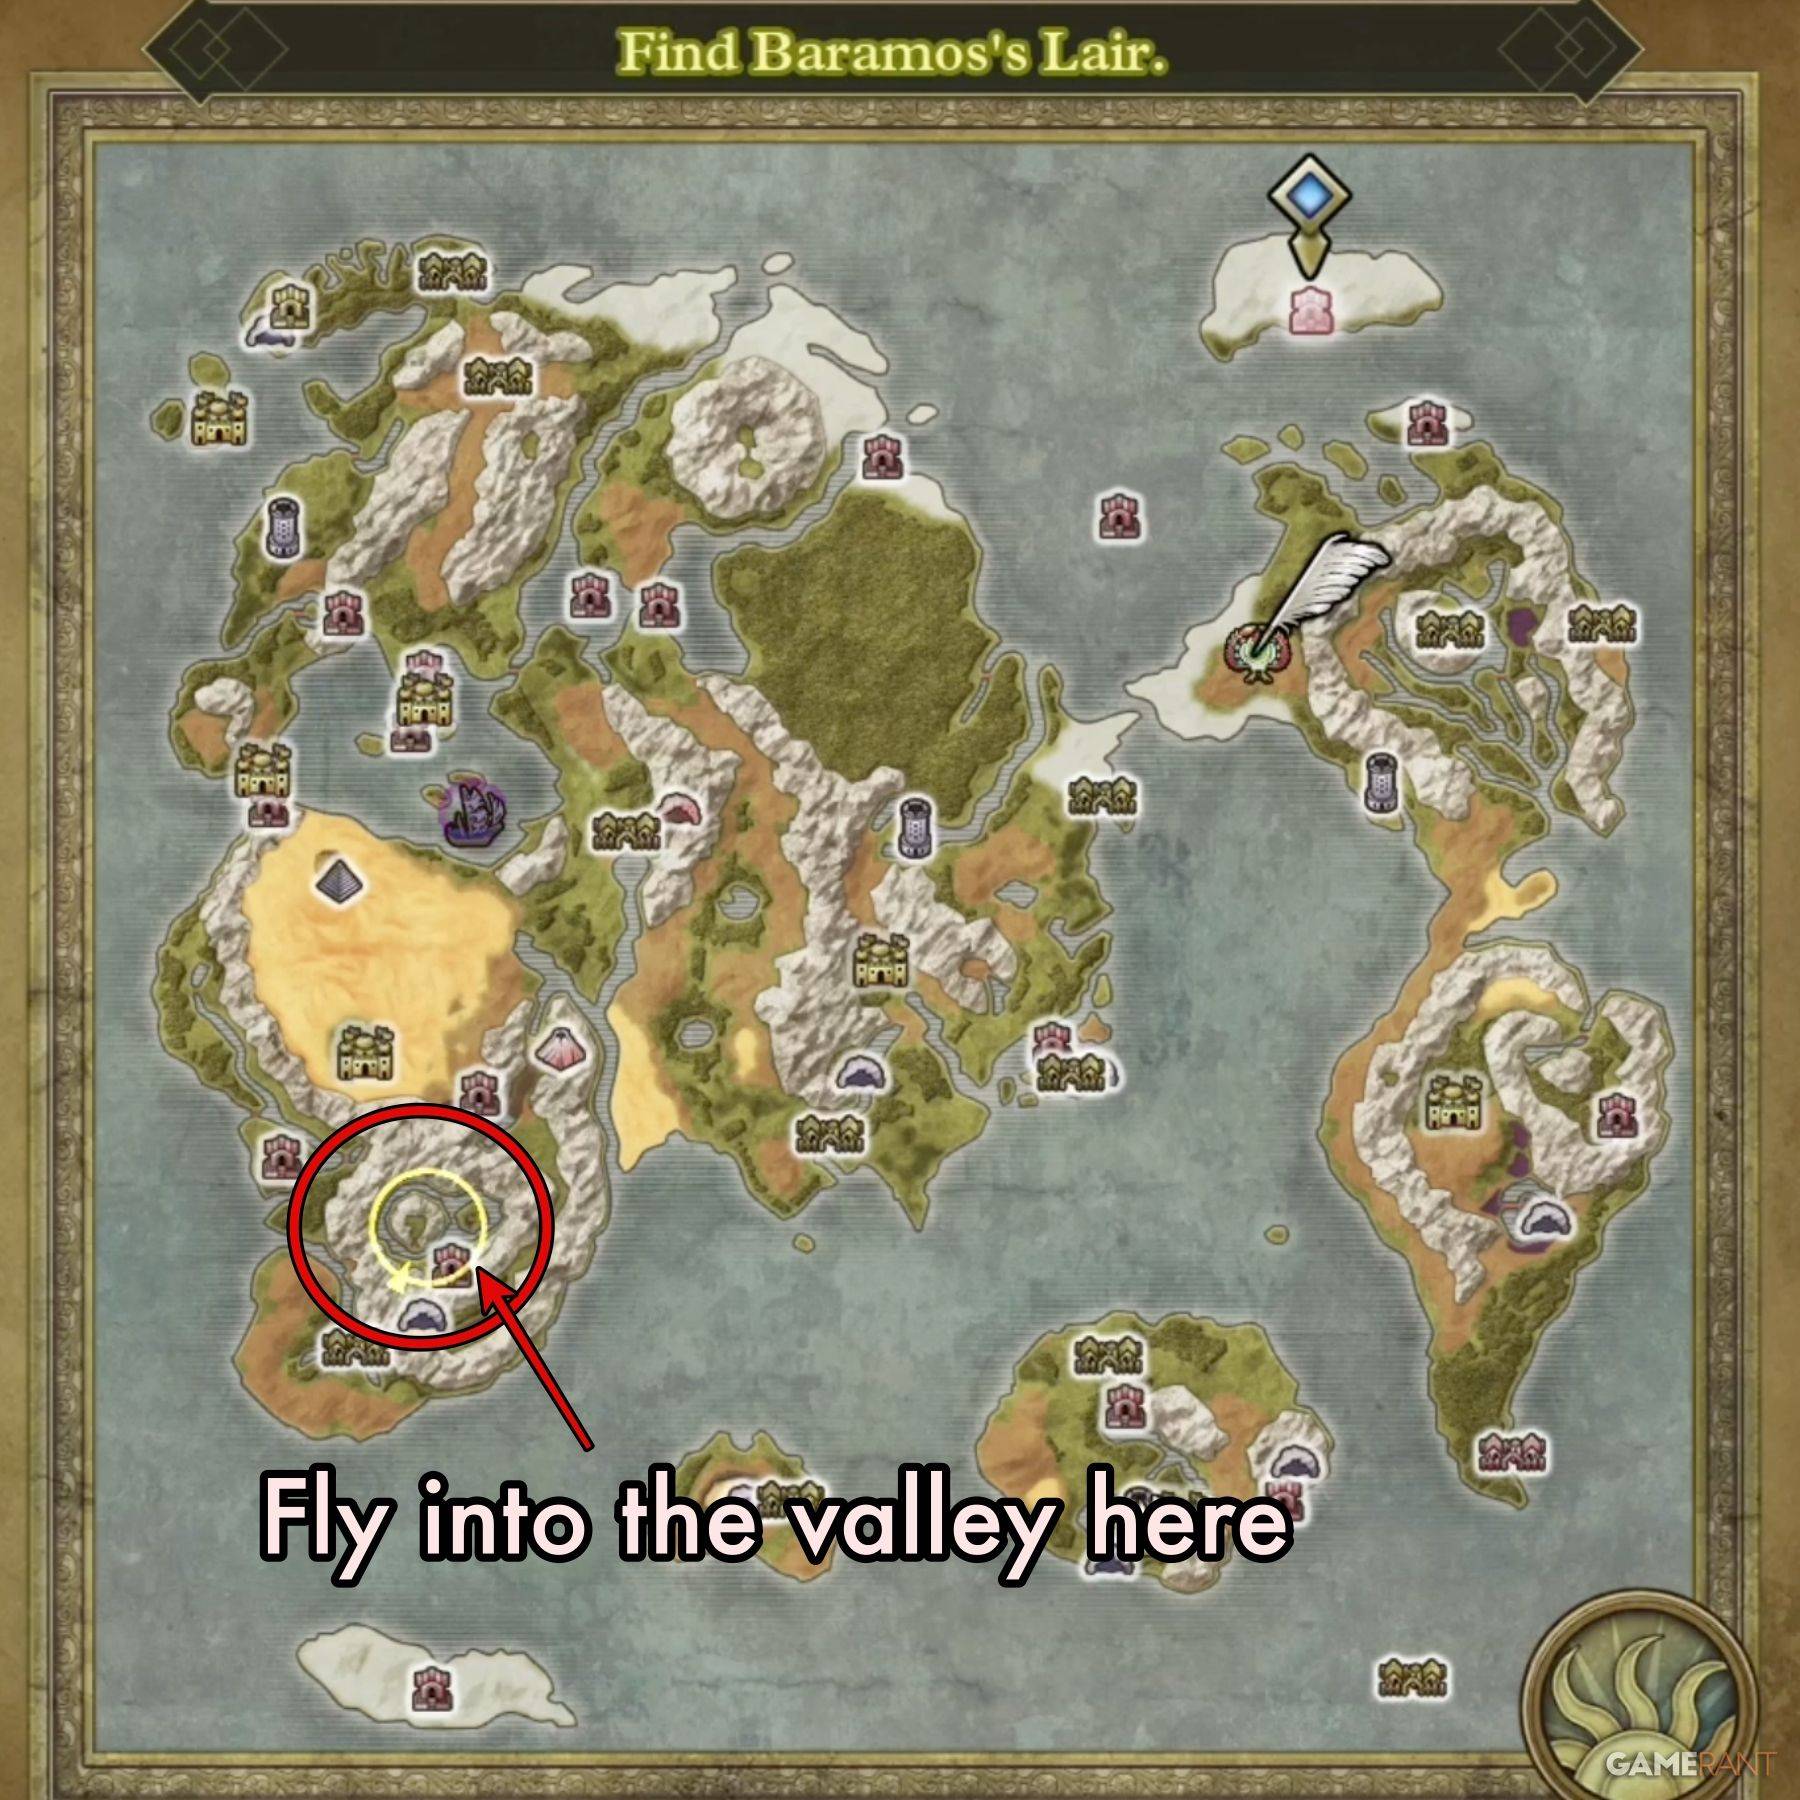
Following the Maw of the Necrogond and acquiring the Silver Orb, Ramia becomes available. Fly from either the Shrine of the Everbird or Necrogond Shrine. Baramos's Lair is situated on an island north of the Necrogond Shrine, surrounded by mountains. Ramia will transport you directly to the dungeon entrance.
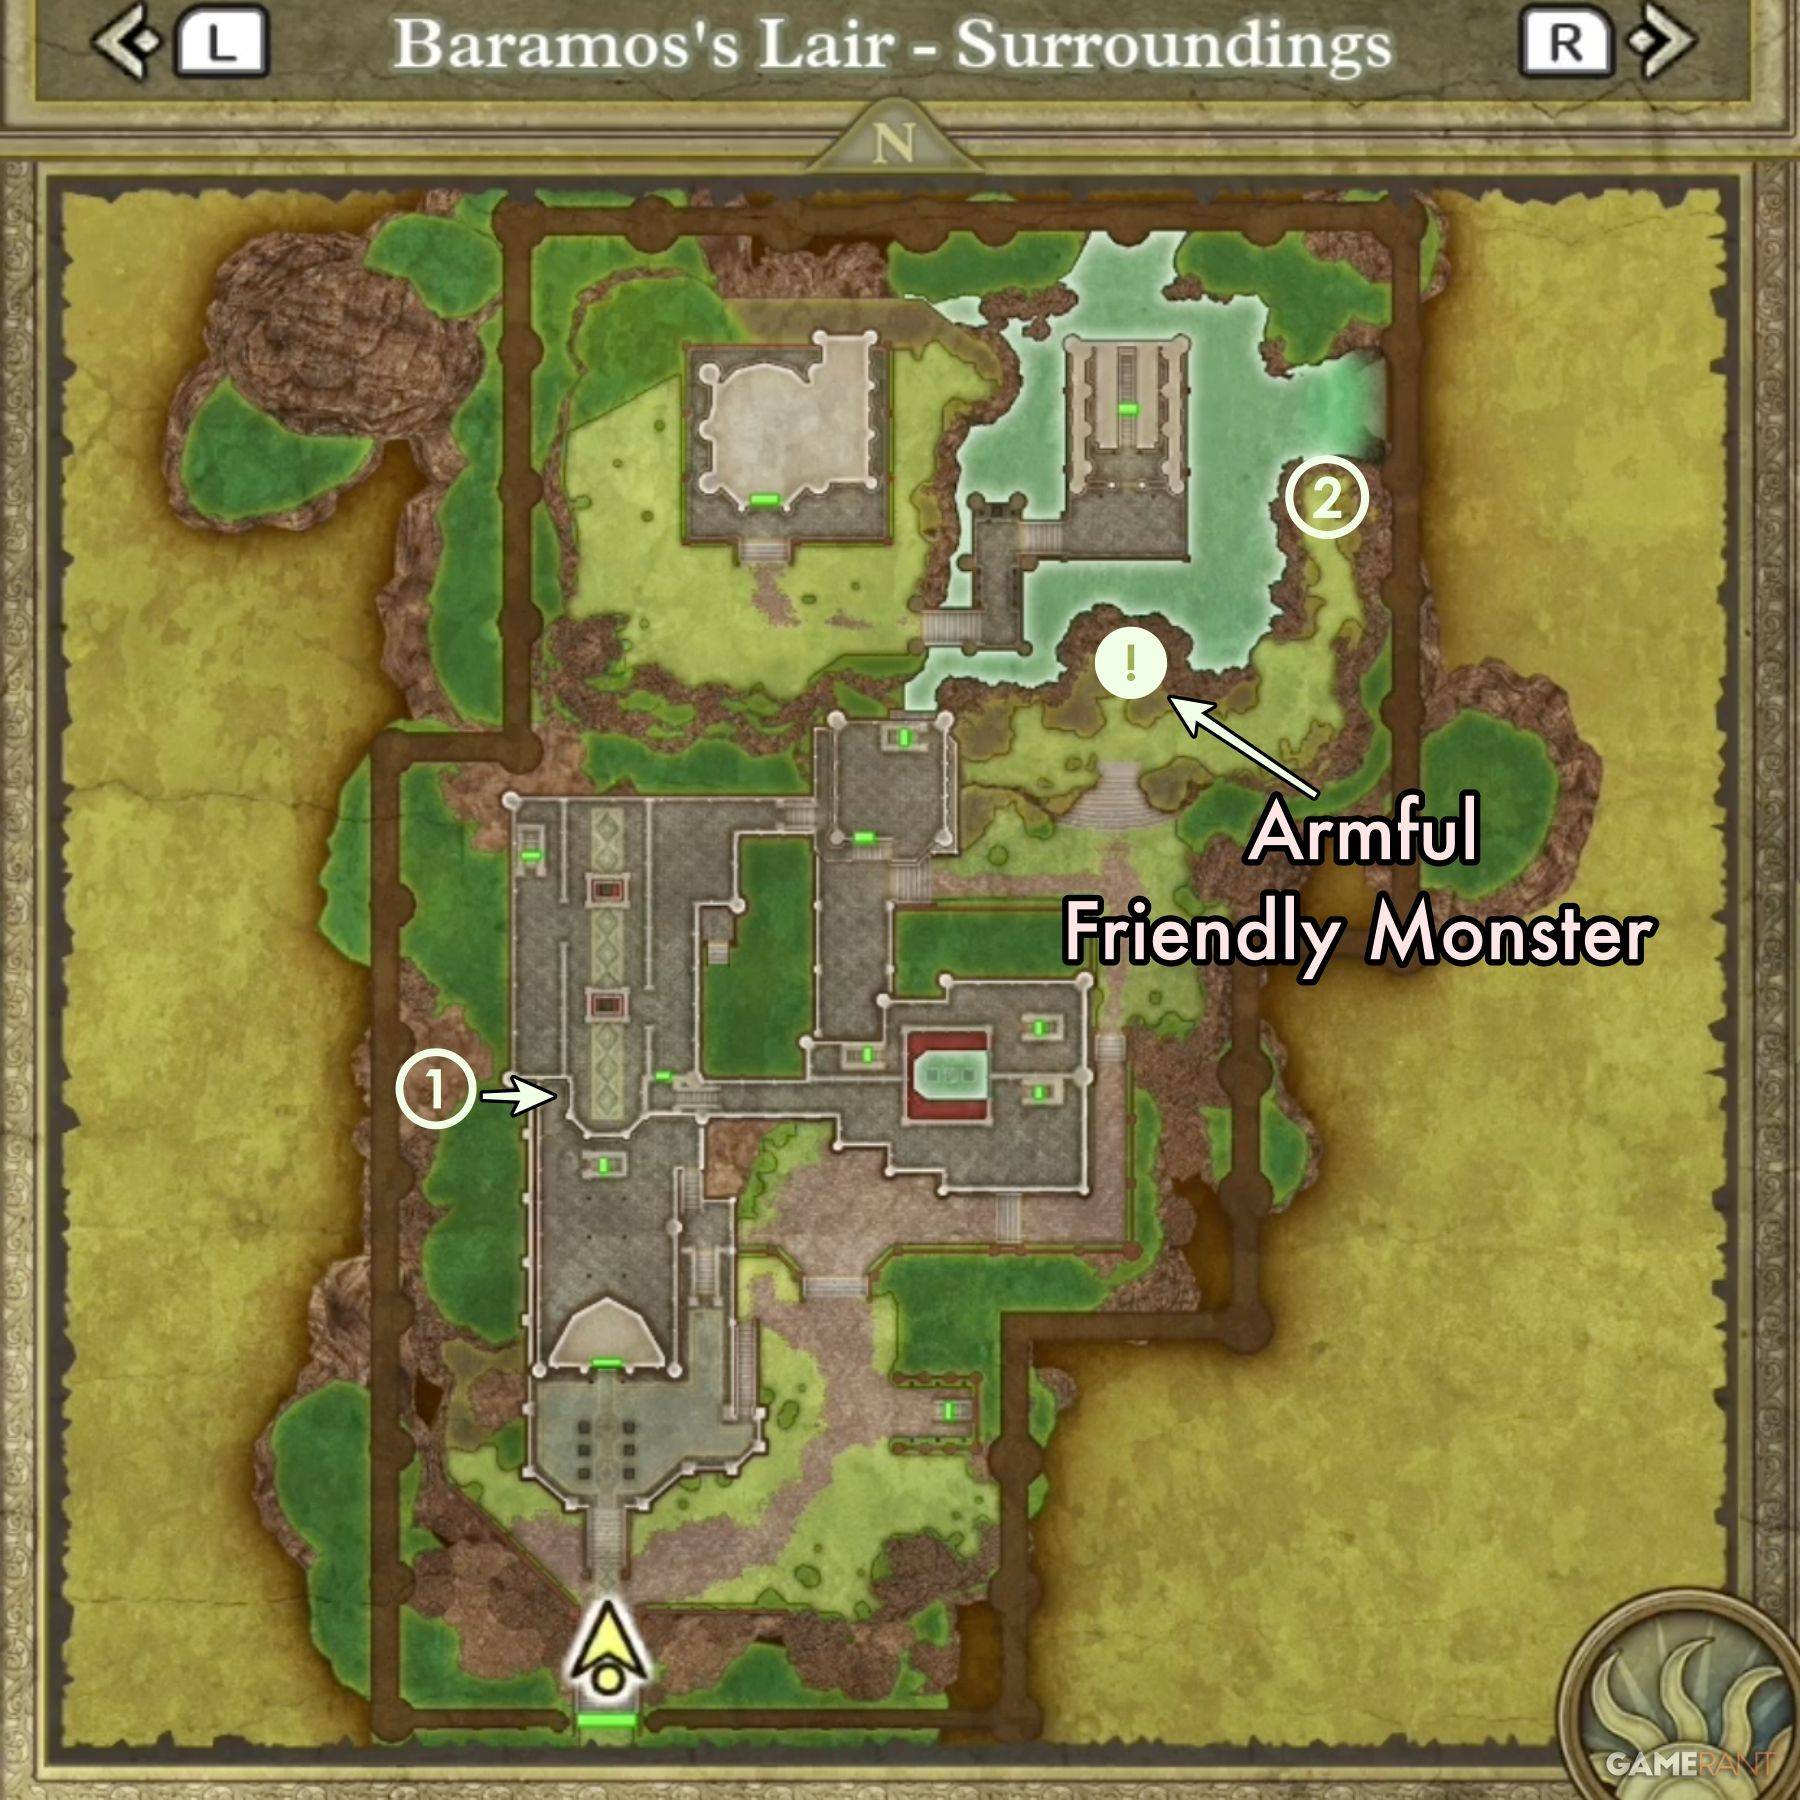
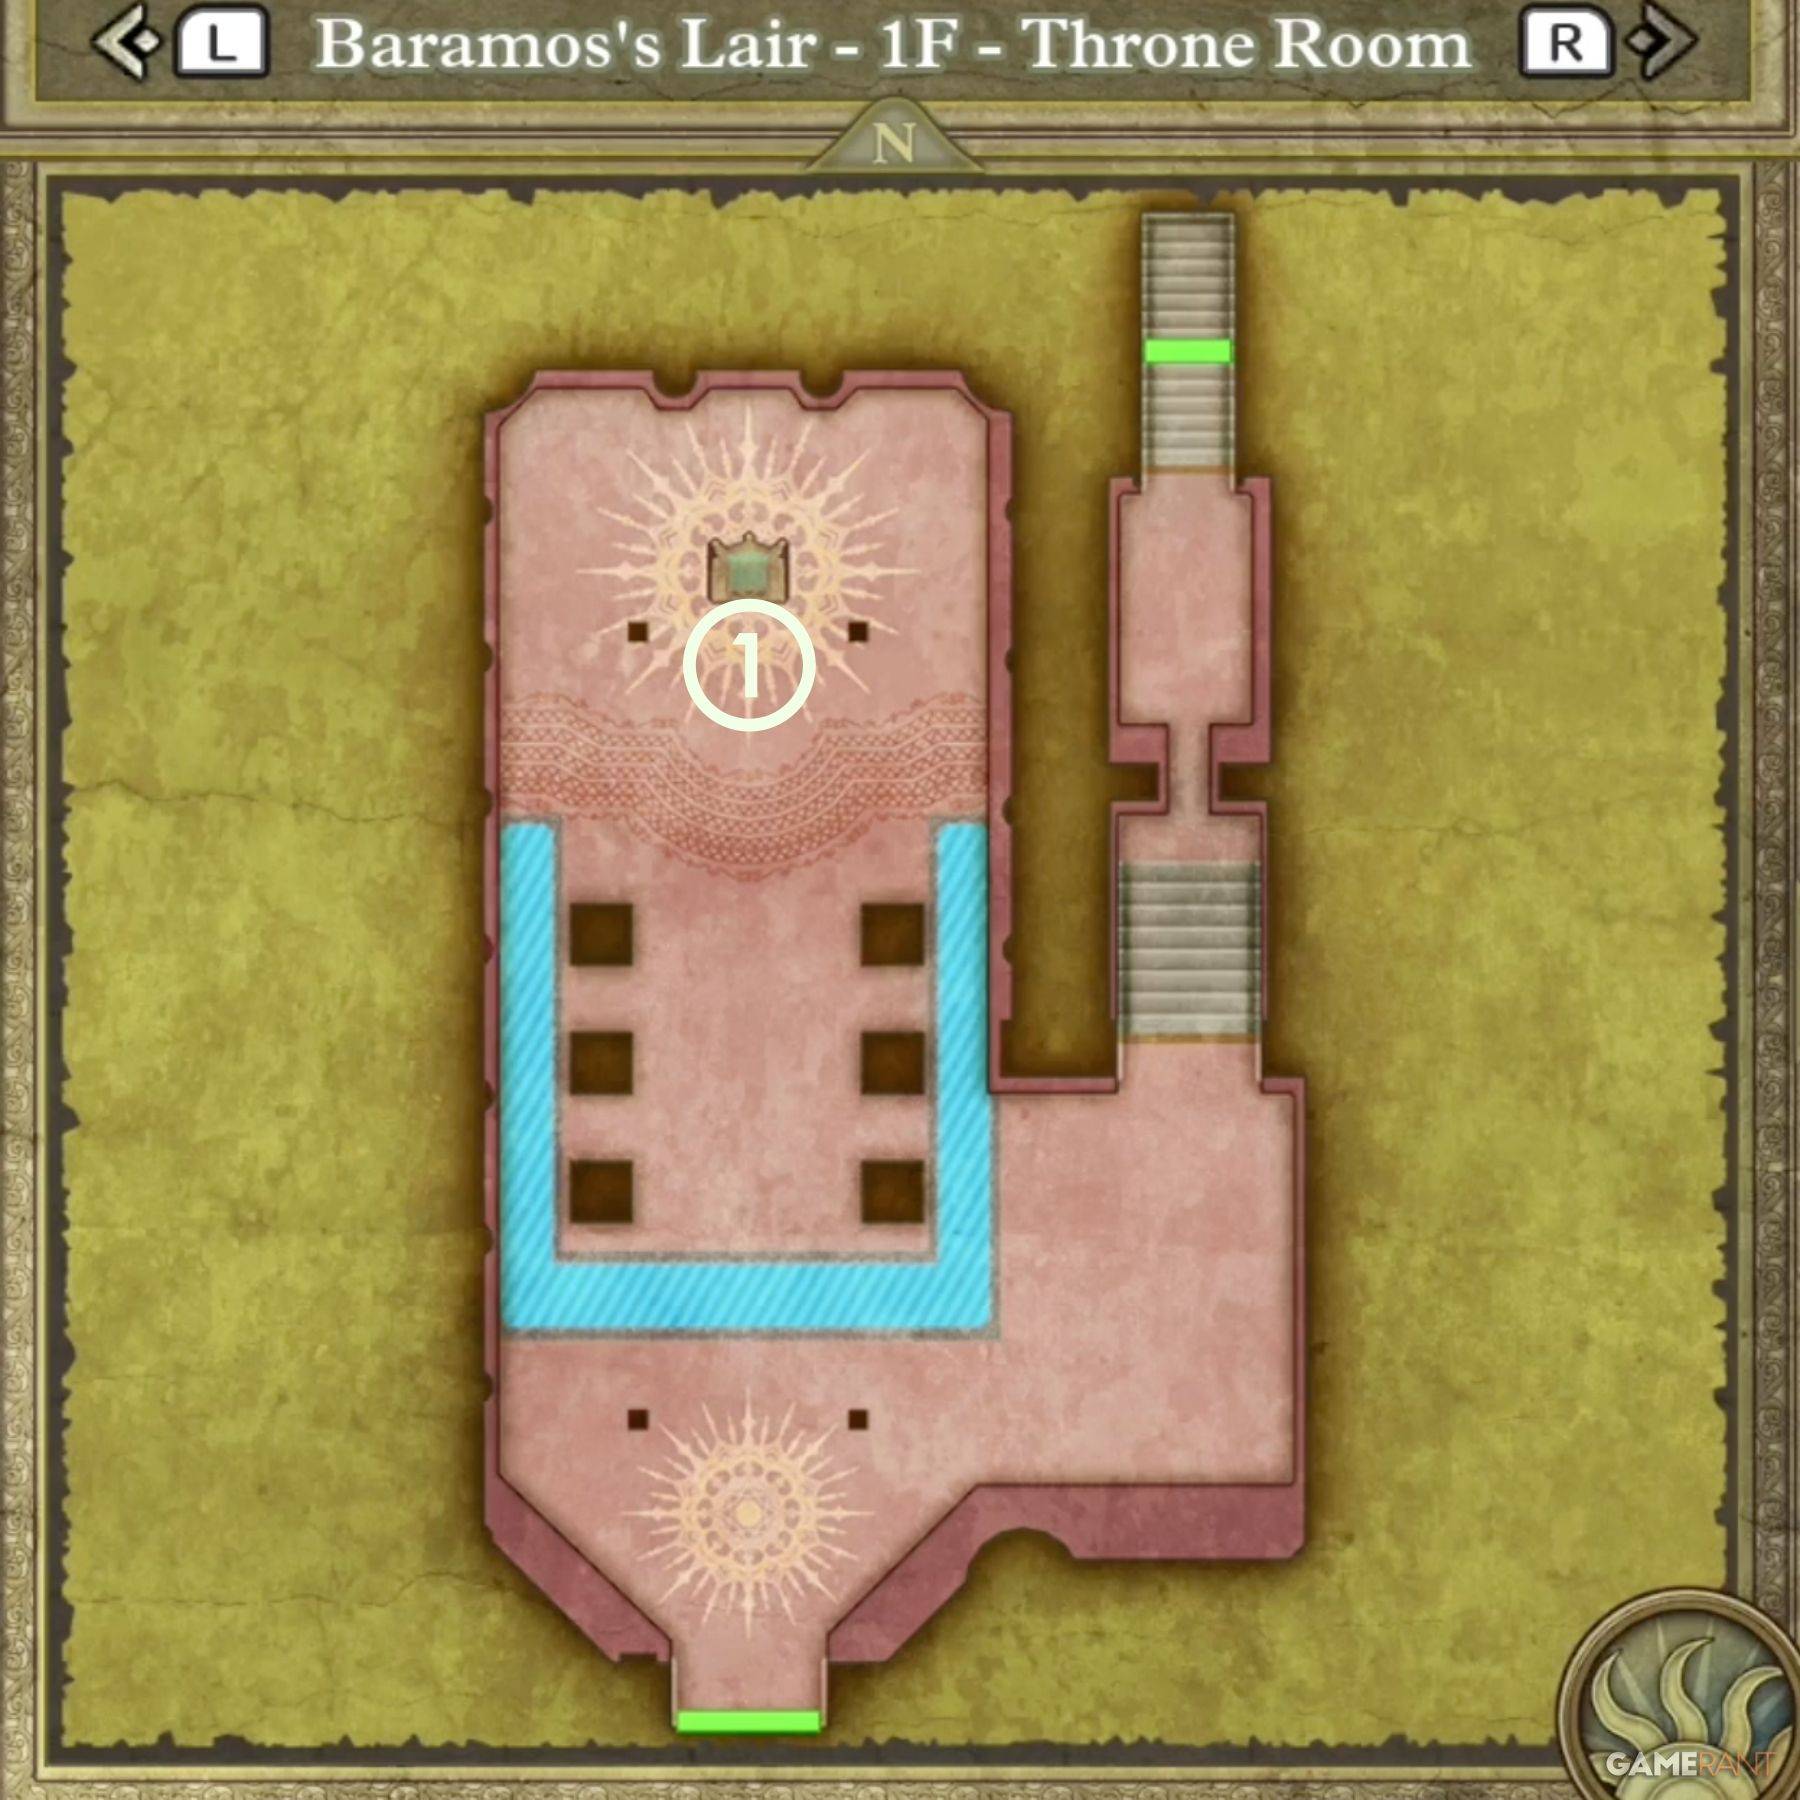
Unlike typical dungeons, Baramos's Lair involves traversing indoor and outdoor areas. The objective is to reach Archfiend Baramos. The main outdoor area, "Surroundings," serves as a central hub. Below is the main path to the boss fight, with treasure locations detailed separately.
Main Path to Baramos:
Surroundings:
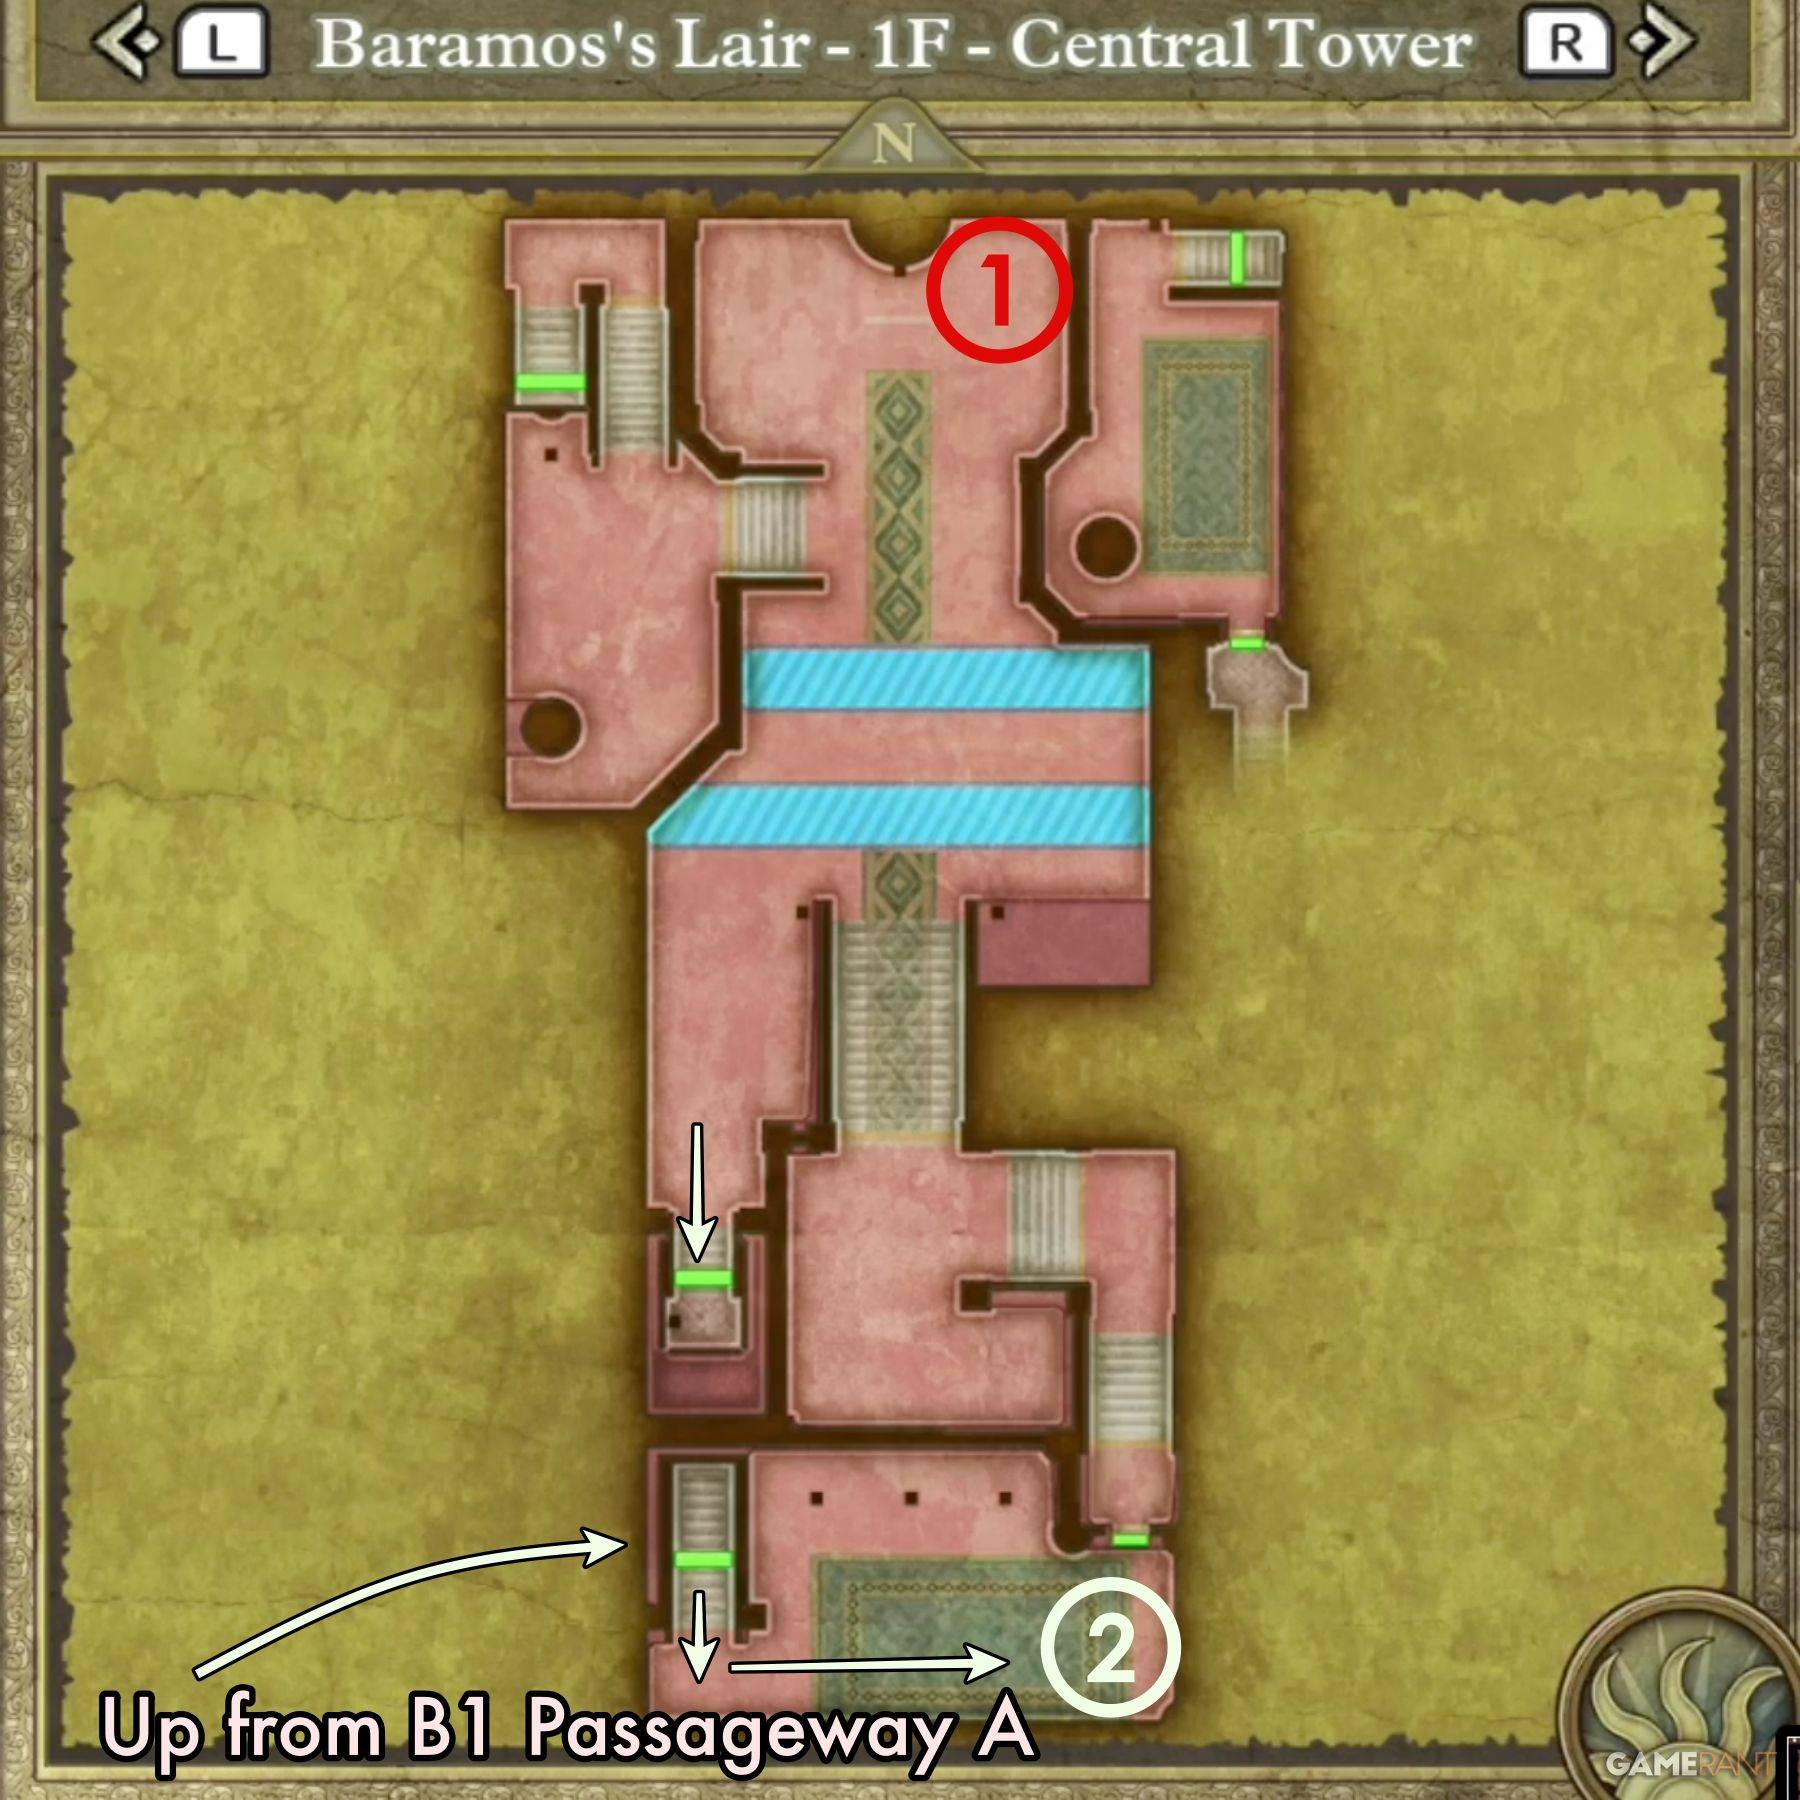
Central Tower:
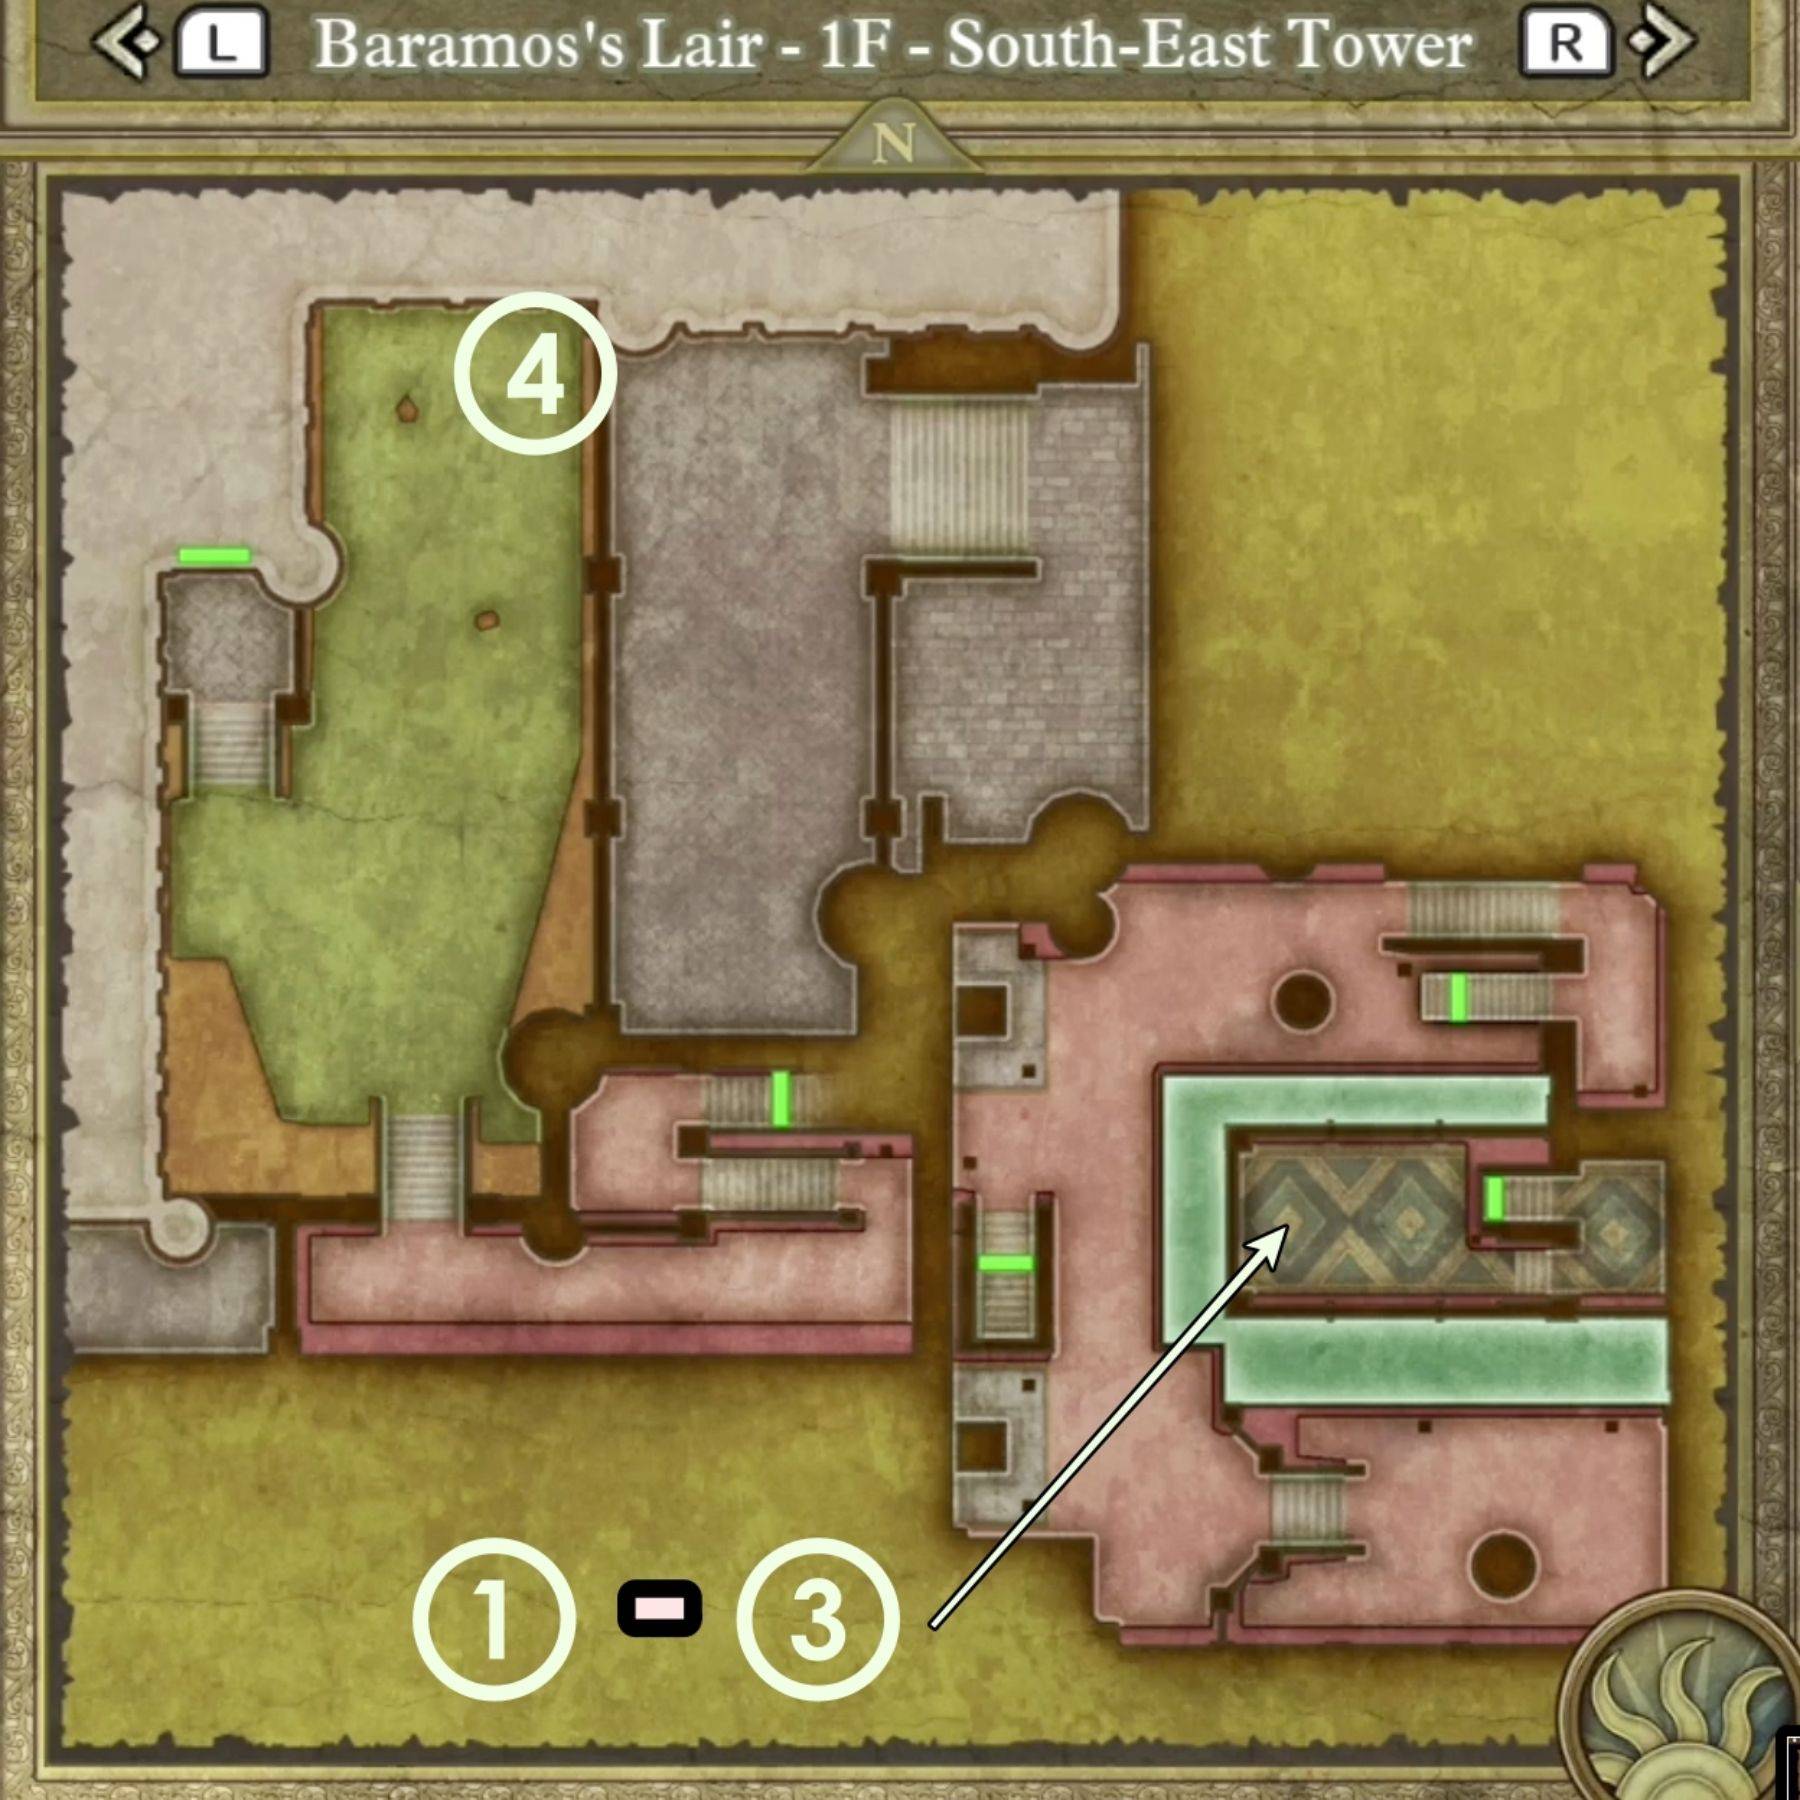
South-East Tower:
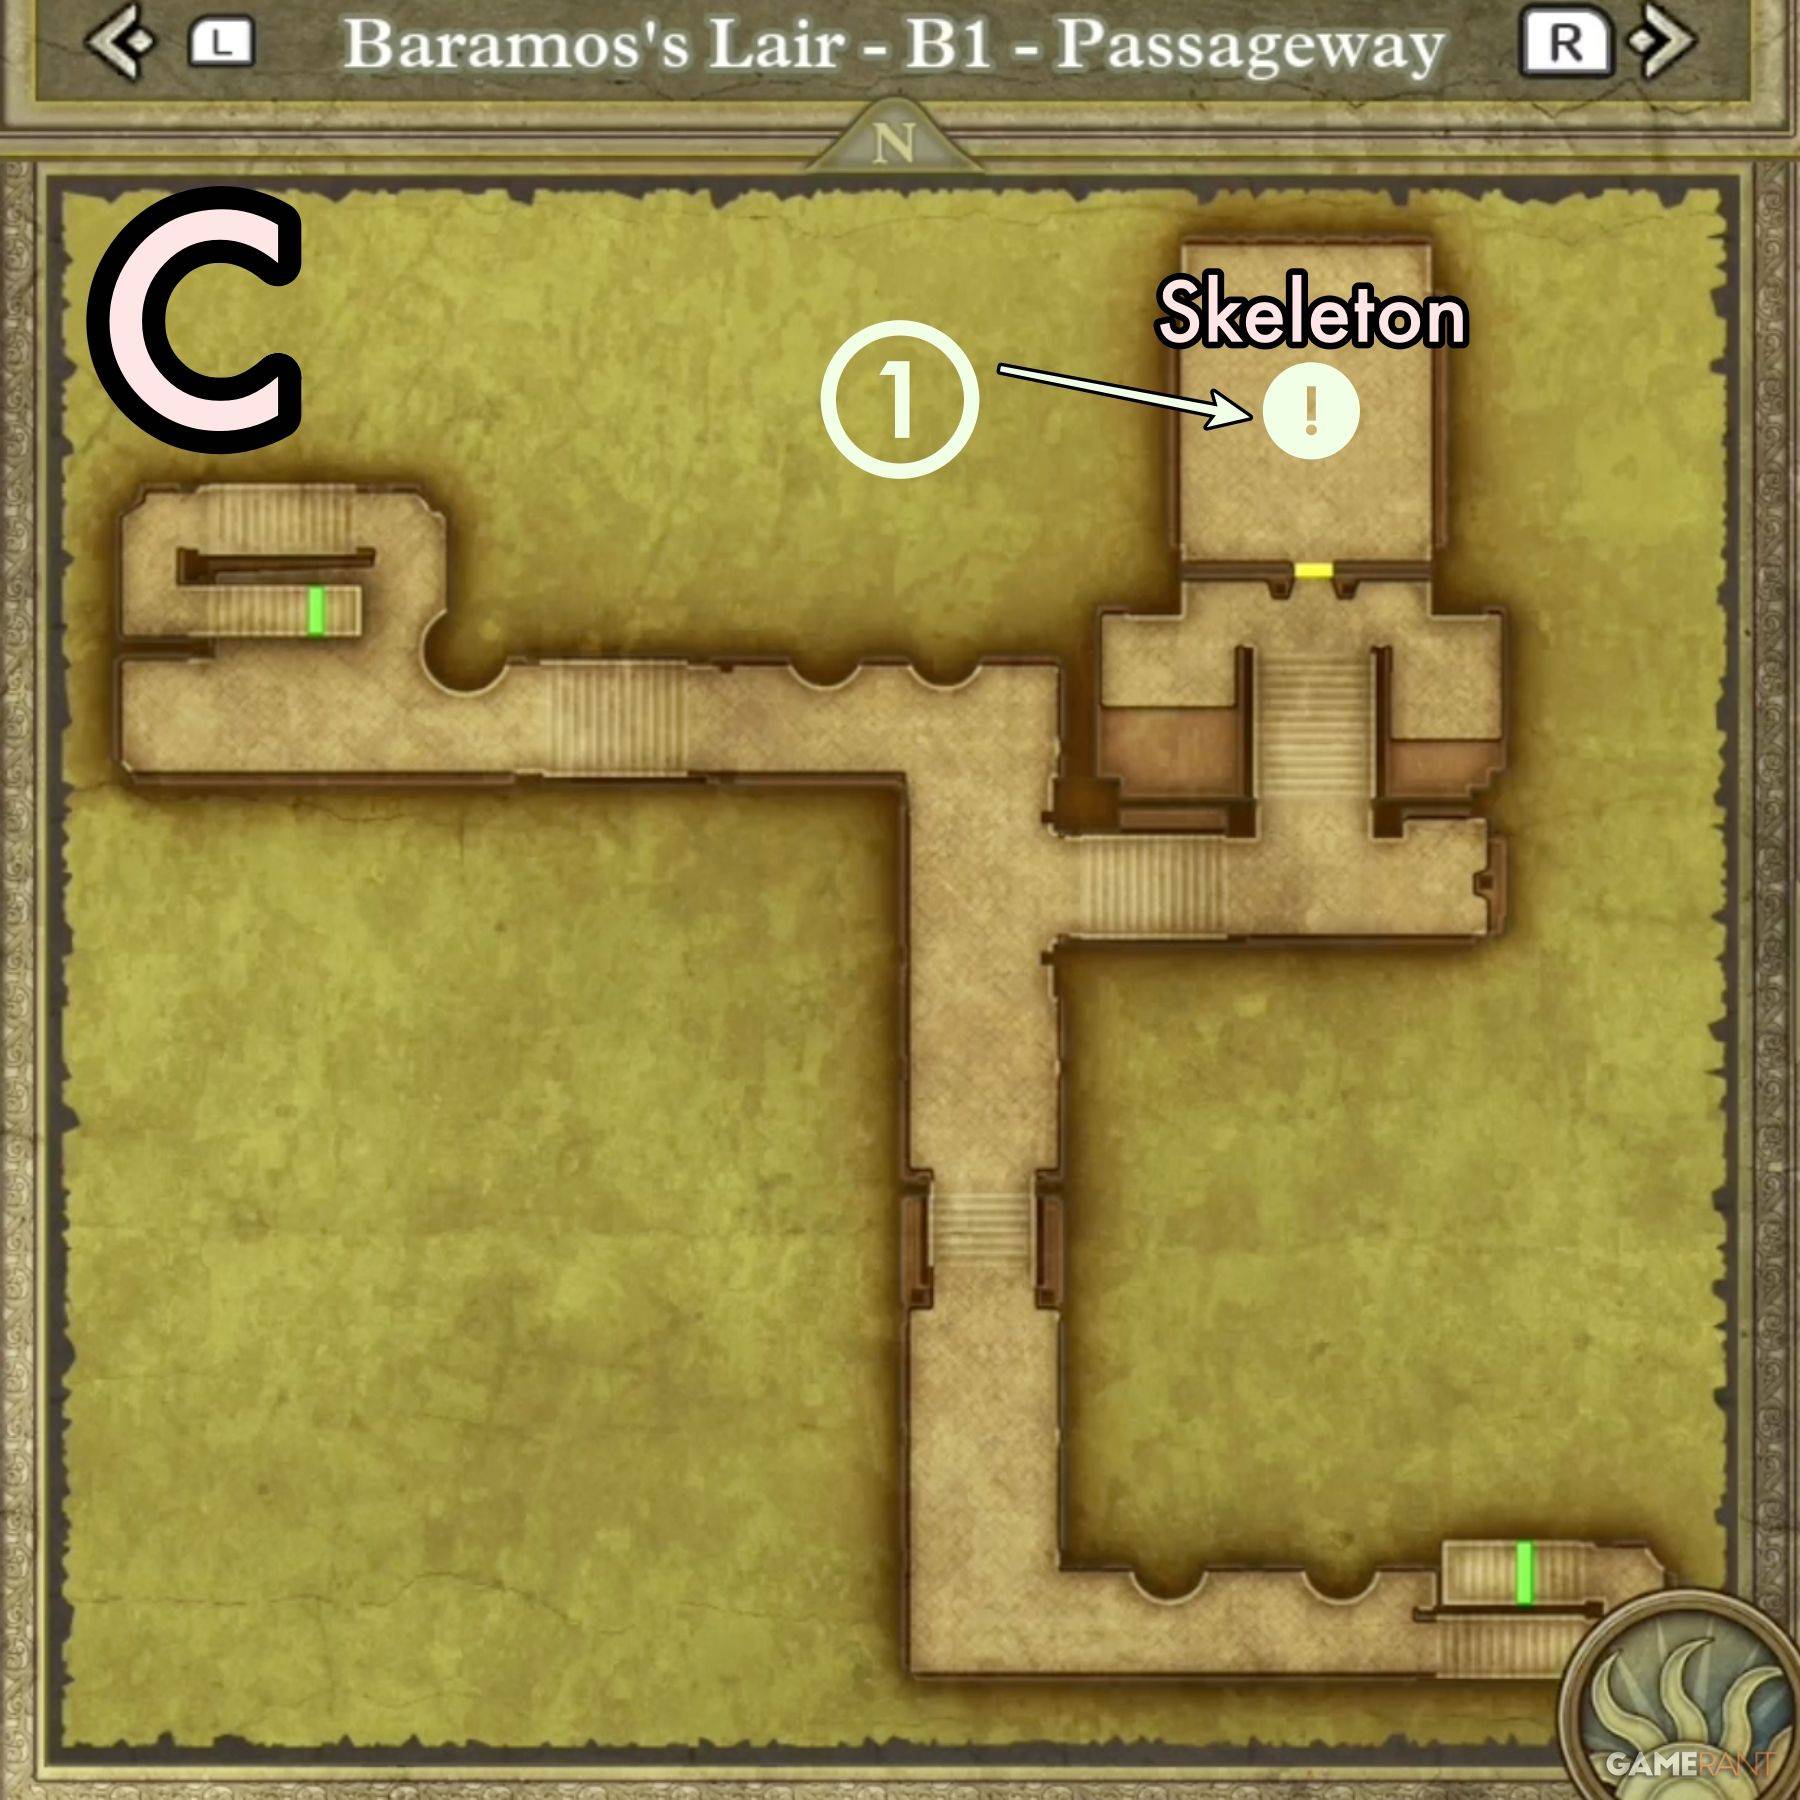
B1 Passageway:
Throne Room:
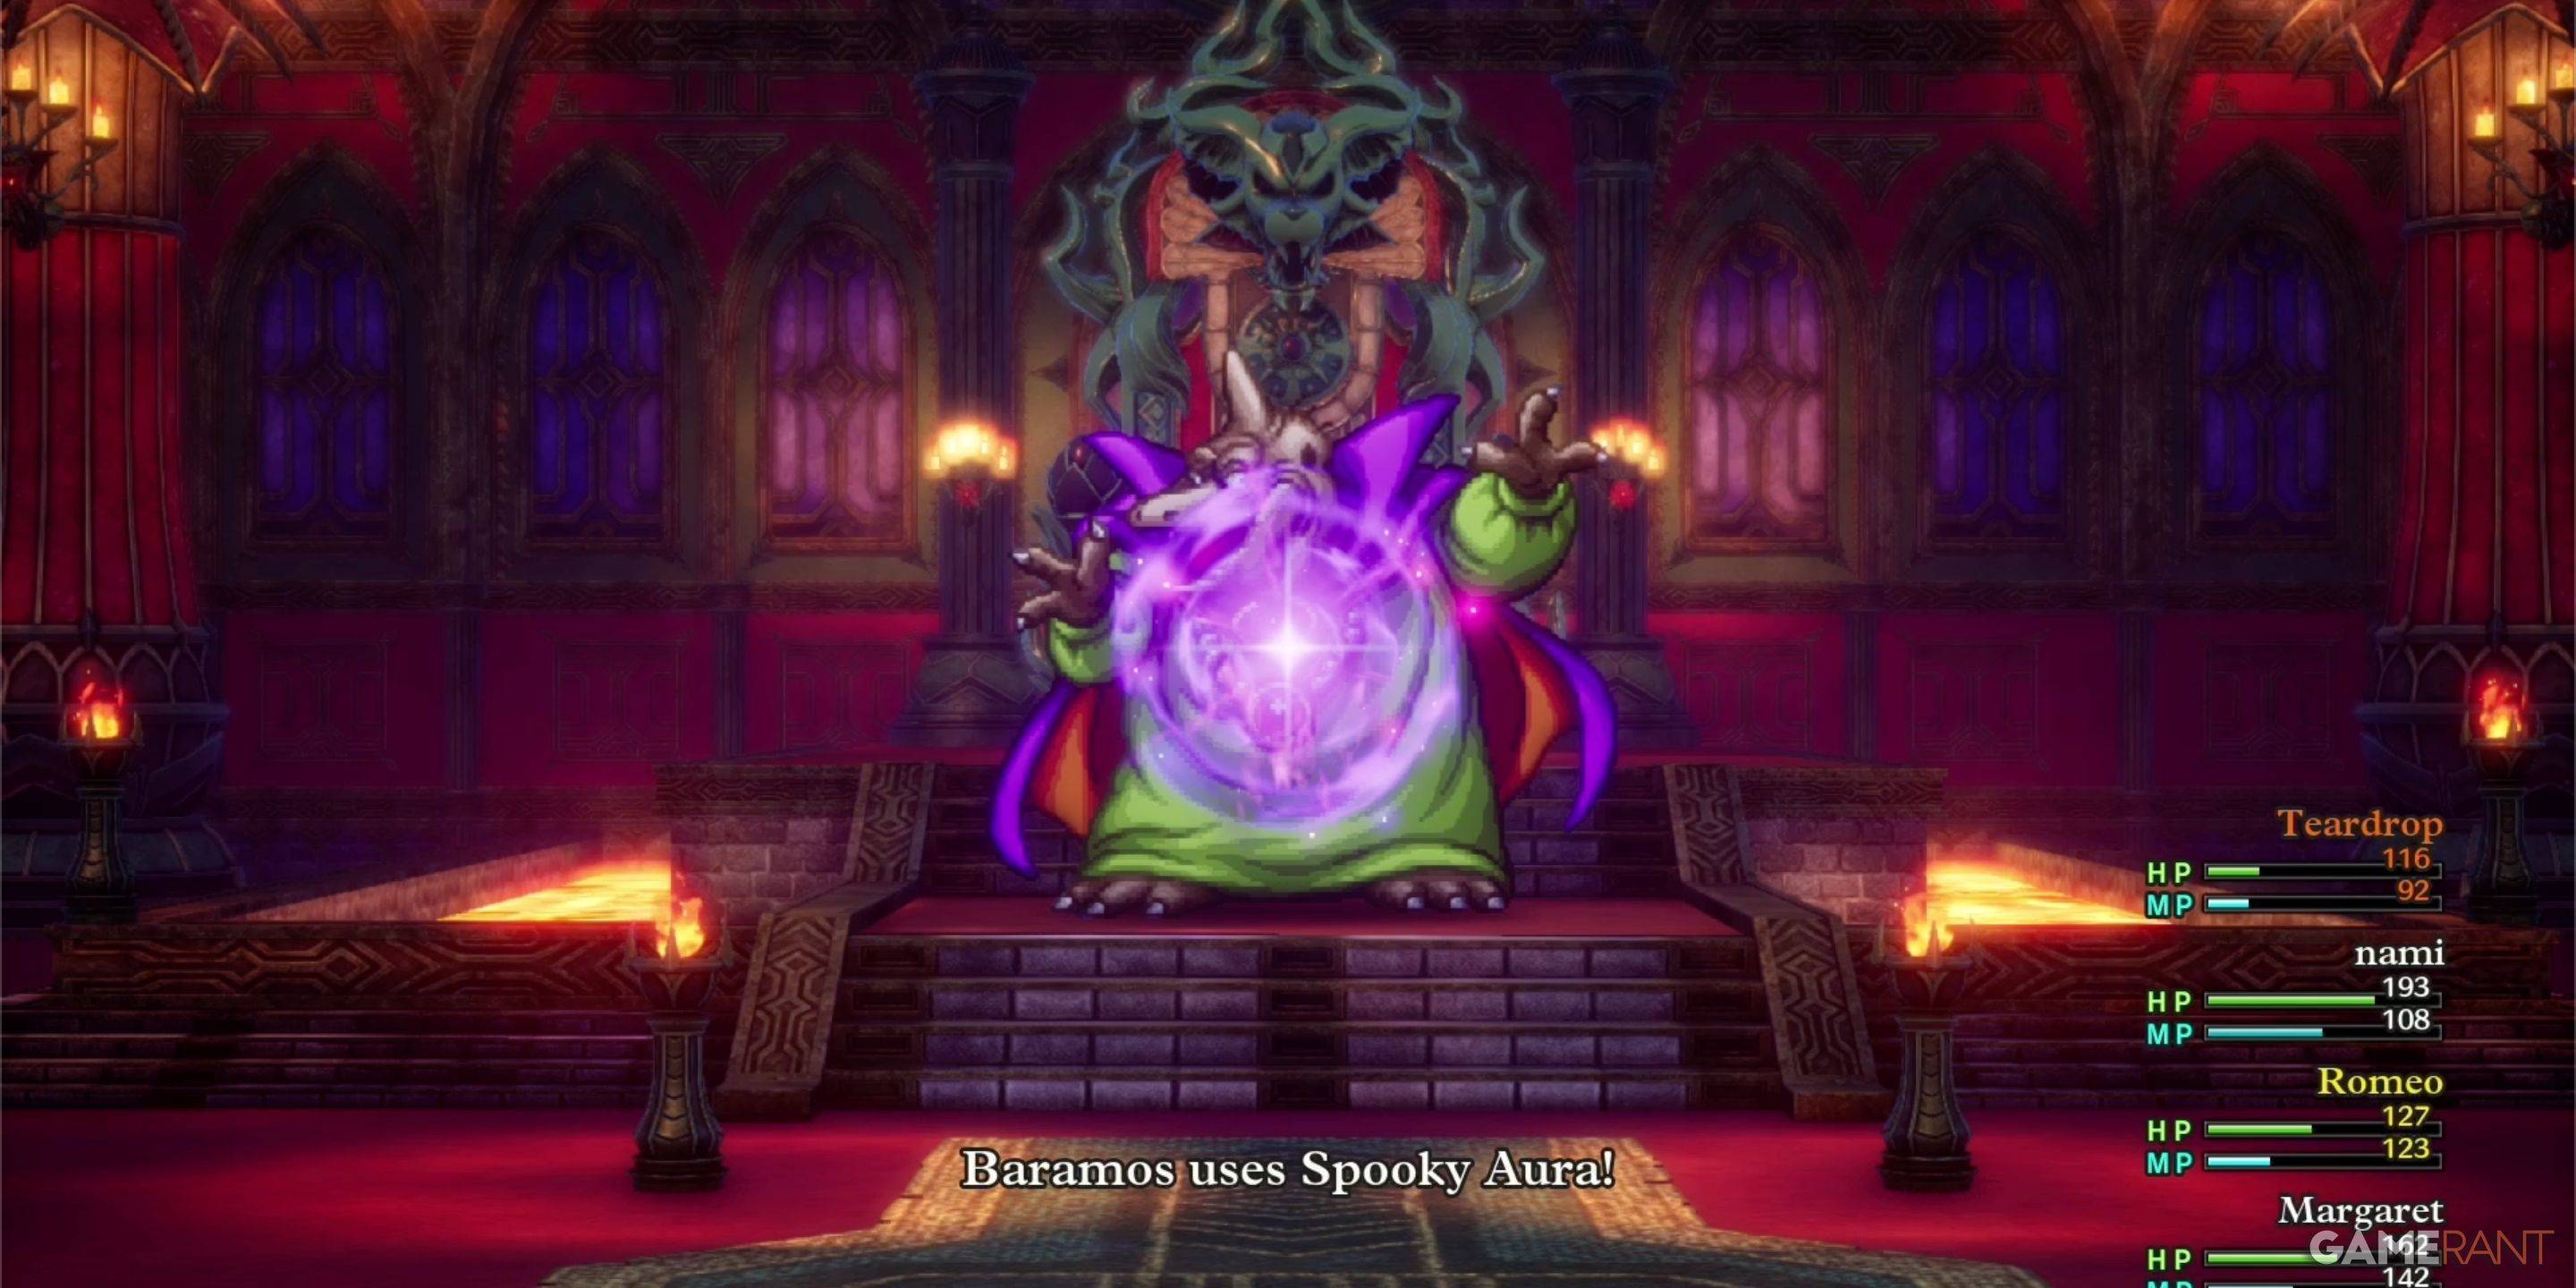
Baramos is a formidable opponent. Strategic planning and appropriate party levels are crucial.
Baramos's Weaknesses:
Utilize high-level spells like Kacrack and Swoosh. Maintain a dedicated healer to counteract Baramos's potent attacks. Prioritize survival over speed.
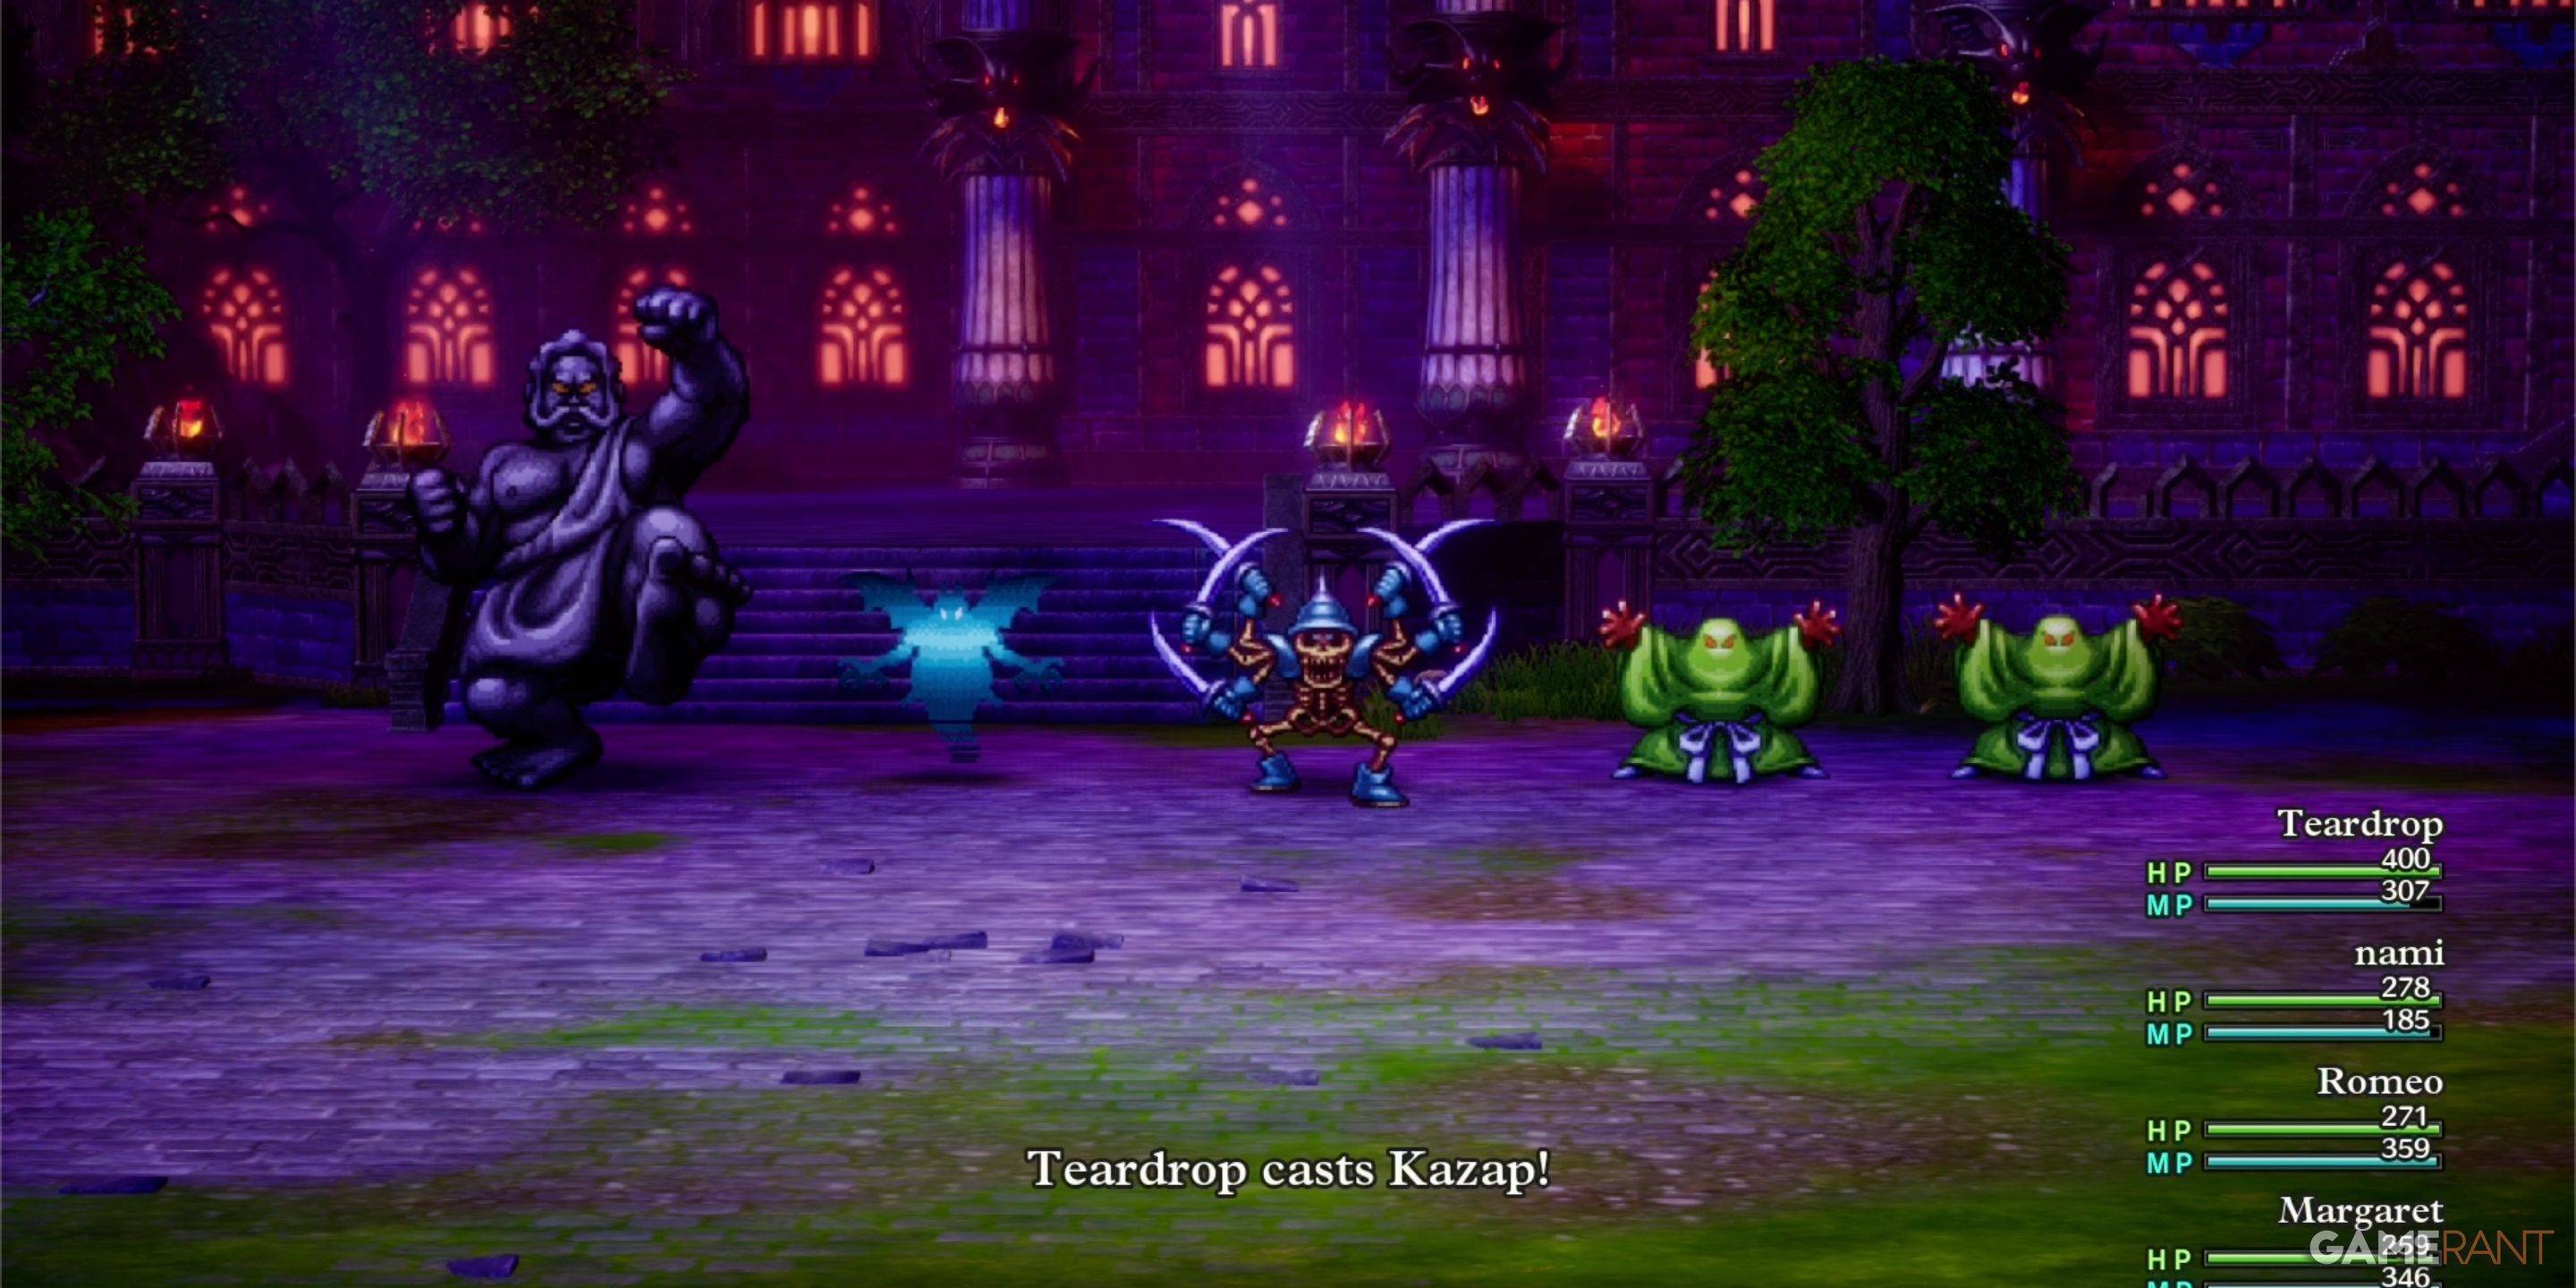
| Monster Name | Weakness |
|---|---|
| Armful | Zap |
| Boreal Serpent | TBD |
| Infanticore | TBD |
| Leger-De-Man | TBD |
| Living Statue | None |
| Liquid Metal Slime | None |
| Silhouette | Varies |
This comprehensive guide should equip you to successfully navigate and conquer Baramos's Lair. Remember to utilize your party's strengths and exploit Baramos's weaknesses for victory!